Friday, 2 November 2018

The 19 Best WordPress Hosting Providers in 2018

If you’re making a WordPress website, you’ll first have to choose a hosting provider. Just one problem: there are hundreds of hosting providers to choose from. And the provider you choose really matters. That’s because it impacts your website’s health, speed, reliability, security, and more.

We have compiled a list of what we believe are 19 of the best WordPress hosting providers available today, complete with a few key takeaways from each for you to review.

Important note: Each of these hosting providers offers several plans that include a variety of different features respectively and, therefore, range drastically in price. Due to this, we recommend you click the link to the website of any provider you are interested in and review their pricing details and plans prior to making any decisions about what will work for you and your website.

Let’s get started.

The 19 Best WordPress Hosting Providers in 2018

1. WP Engine

WP-Engine-wordpress-hosting

Source: WP Engine

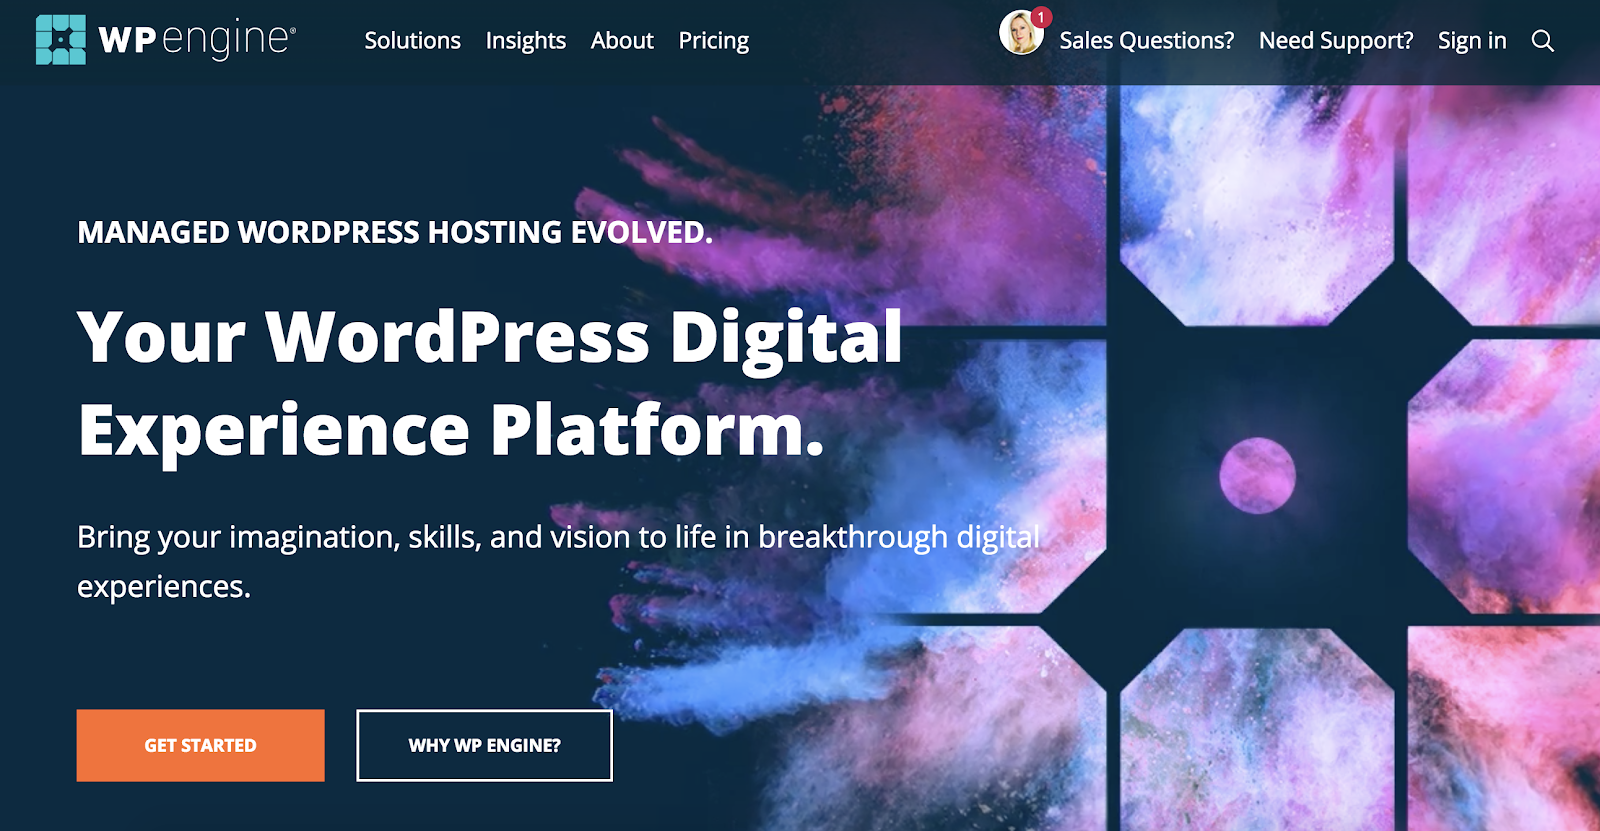
WP Engine is unique because it is a managed WordPress hosting provider so it is tailored to certain business’ specific needs and has a variety of advanced services available for those businesses. That means WP Engine is a pre-configured and pre-optimized hosting provider that can save you time and work when installing and creating your website. WP Engine also offers server upgrades, advanced protection to keep your website secure, and troubleshooting.

Key takeaways:

  • Managed WP hosting provider
  • Constant updates and server upgrades
  • Reliable expert support


2. Kinsta

kinsta-wordpress-hosting

Source: Kinsta

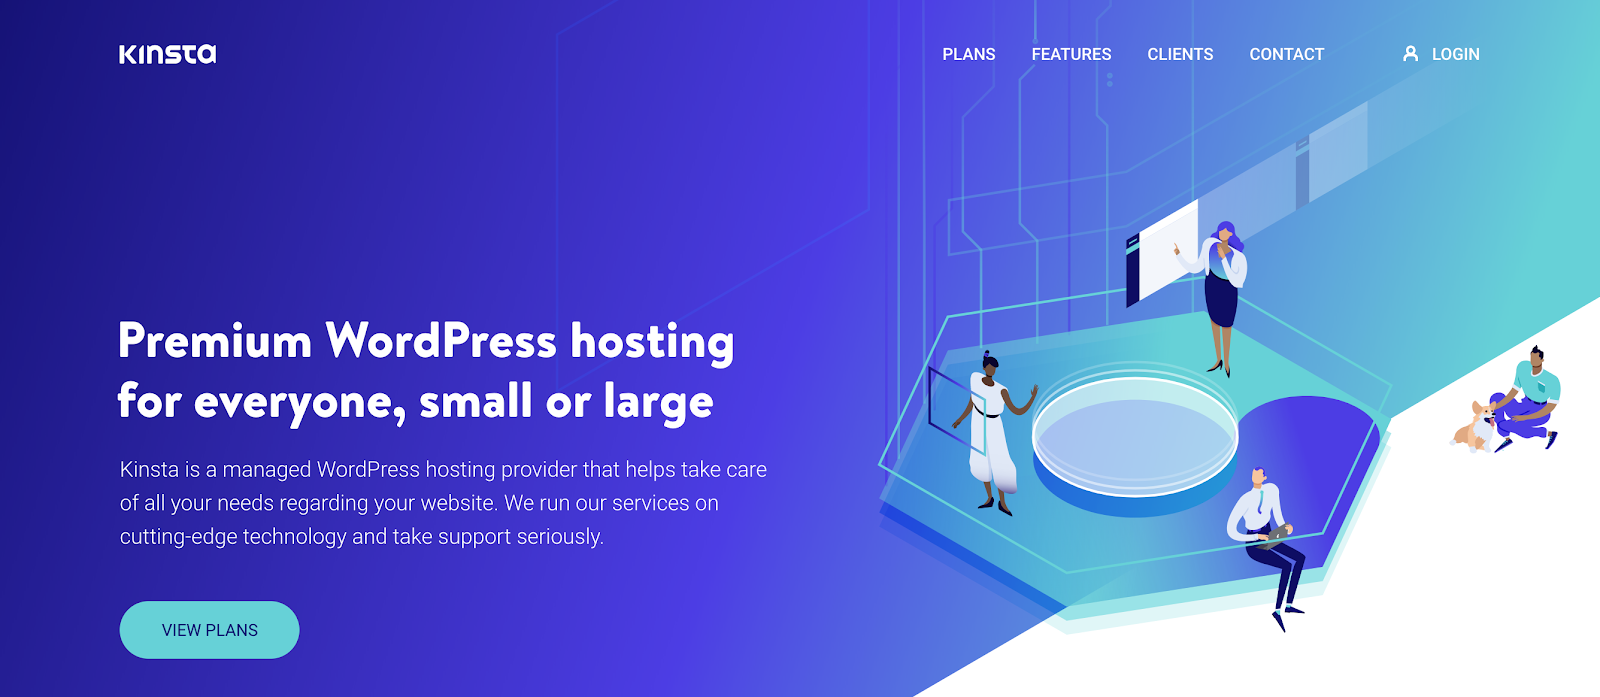
Kinsta is a WordPress hosting provider suitable for anyone due to its free migrations, daily backups, and strong security. Kinsta has a unique dashboard that serves as a control center so you can easily review all of your sites, look at a wide range of analytics, and manage your users with all levels of access.

Key takeaways:

  • Free migrations
  • Daily backups
  • Dashboard to manage your sites, analytics, and users


3. Flywheel
flywheel-wordpress-hosting
SourceFlywheel

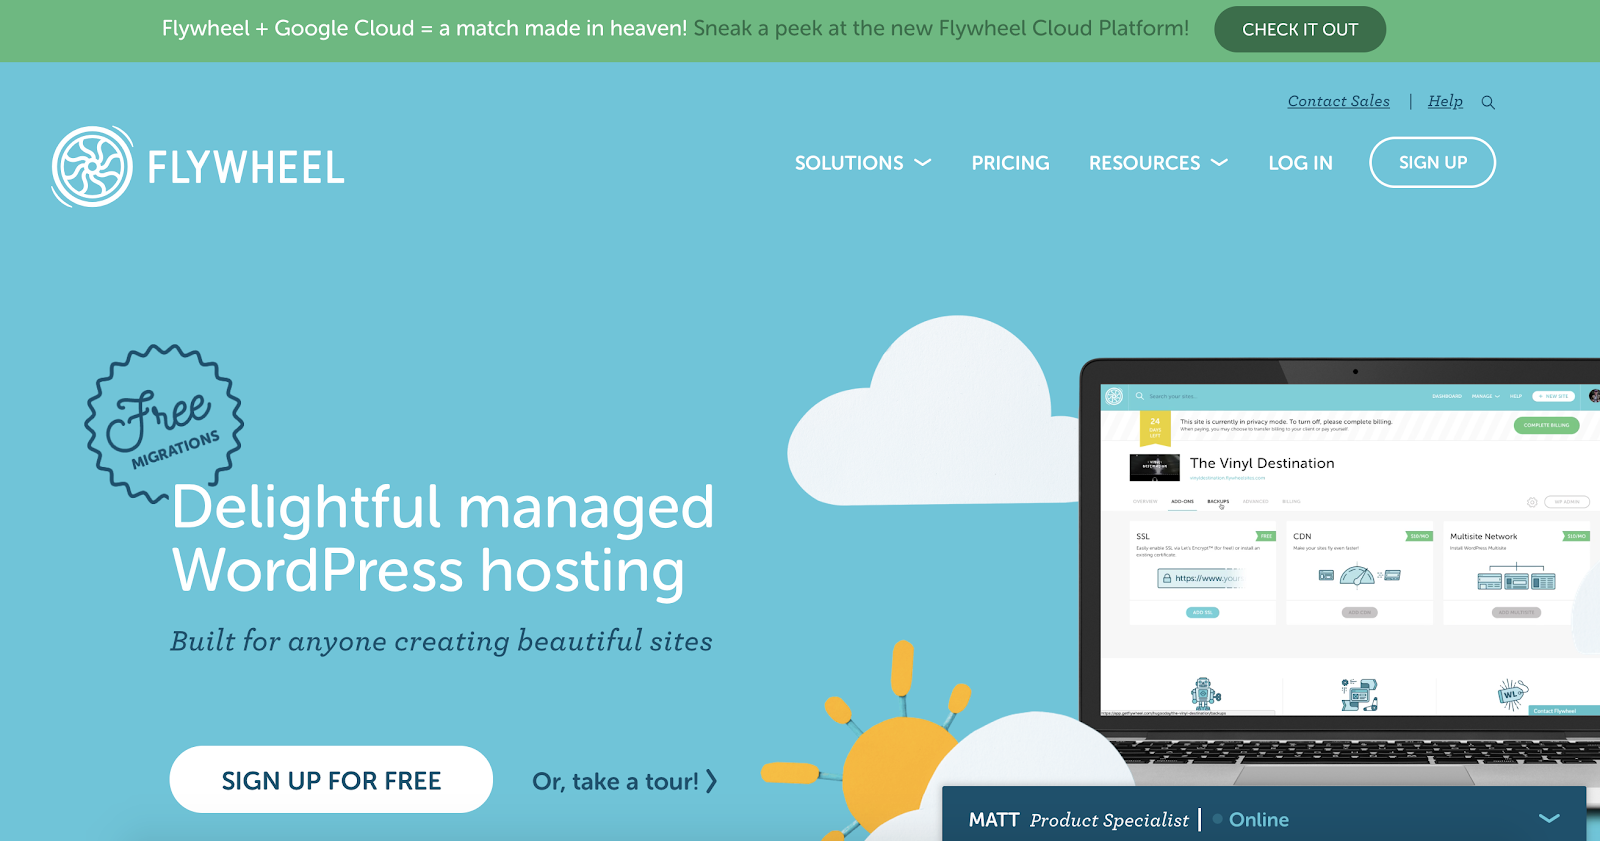
Flywheel is a hosting provider created specifically for WordPress so it allows you to easily build, manage, and launch your WordPress website. What does that mean for you? It is highly effective on the system and allows for fast loading times. There are also nightly backups, so you can rest easy knowing your site will always be protected and you’ll never lose any of your content.

Key takeaways:

  • WP hosting provider and workflow solution
  • Quick loading times
  • Nightly backups


4. Plesk

plesk-wordpress-hosting

Source: Plesk

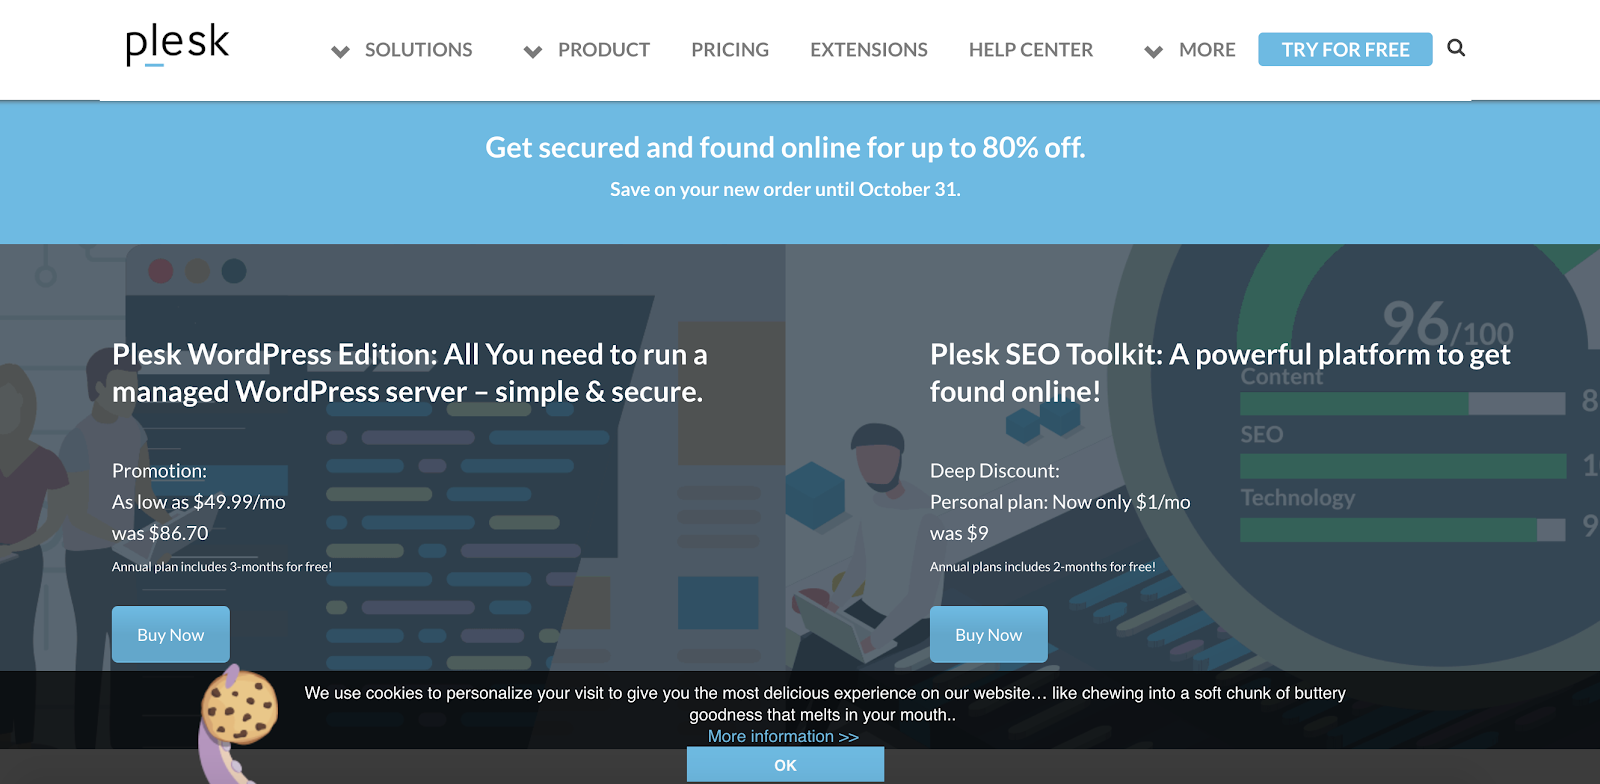
Plesk is unique because it is a WP hosting provider and web operations platform so it offers technical, security, and automation tools that allow you to run all of your websites from a single platform. Plesk is also unique because it is certified to run on major virtualization, cloud, and container platforms, so you get maximum compatibility out of the provider.

Key takeaways:

  • WP hosting and web ops combination
  • Ability to run multiple websites from one hosting platform
  • Certified to run on virtualization, cloud, and container platforms


5. DreamHost

dreamhost-wordpress-hosting

Source: DreamHost

DreamHost provides you with an organized control panel that you can customize to easily manage all of your website hosting features in a way that makes the most sense to you. Not all providers give you access to assistance day and night, but DreamHost does — with 24/7 support available, you can get the expert help you need no matter what time you’re working. The provider also offers backups and server caching so both your site’s performance and storage are maximized.

Key takeaways:

  • Organized control panel
  • 24/7 expert support
  • Daily backups and server caching


6. BlueHost 

bluehost-wordpress-hosting

Source: BlueHost

BlueHost works for everyone, from entrepreneurs to growing businesses to large companies and online stores because of its free domain registration, SSL certificate, reliable support from experts, and automatic WordPress installation.

BlueHost also offers reliable 99% uptime because their servers are in their own data centers — this sets the provider apart from many competitors who may rent out their data centers. If you’re unsure about whether or not BlueHost is a good option for you, don’t sweat it — they have a 30-day money back guarantee.

Key takeaways:

  • Works for businesses of all sizes
  • Free domain registration
  • 30-day money back guarantee


7. InMotion Hosting 
inmotion-wordpress-hosting

Source: InMotion Hosting

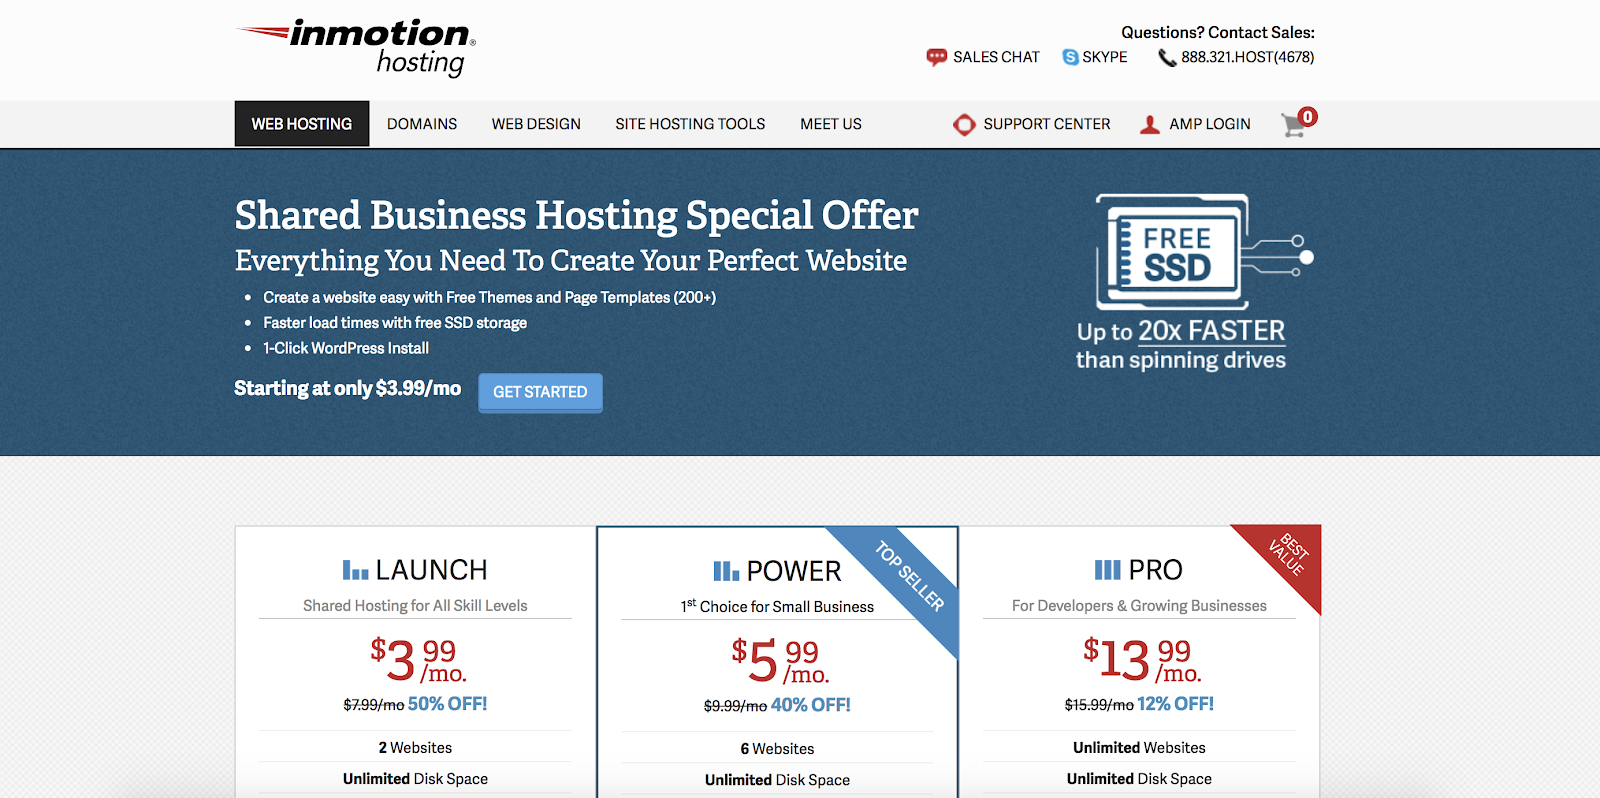
With InMotion Hosting, you can complete your WordPress installation with just one click. The provider is known for having fast load times and free SSD storage, or solid-state drive storage, which is a feature unique to some providers. InMotion also offers free website migration which saves you time, as well as malware and hack protection so you won’t ever need to worry about your site’s security.

Key takeaways:

  • One-click installation
  • Free website migrations
  • Advanced security


8. HostGator

hostgator-wordpress-hosting

Source: HostGator

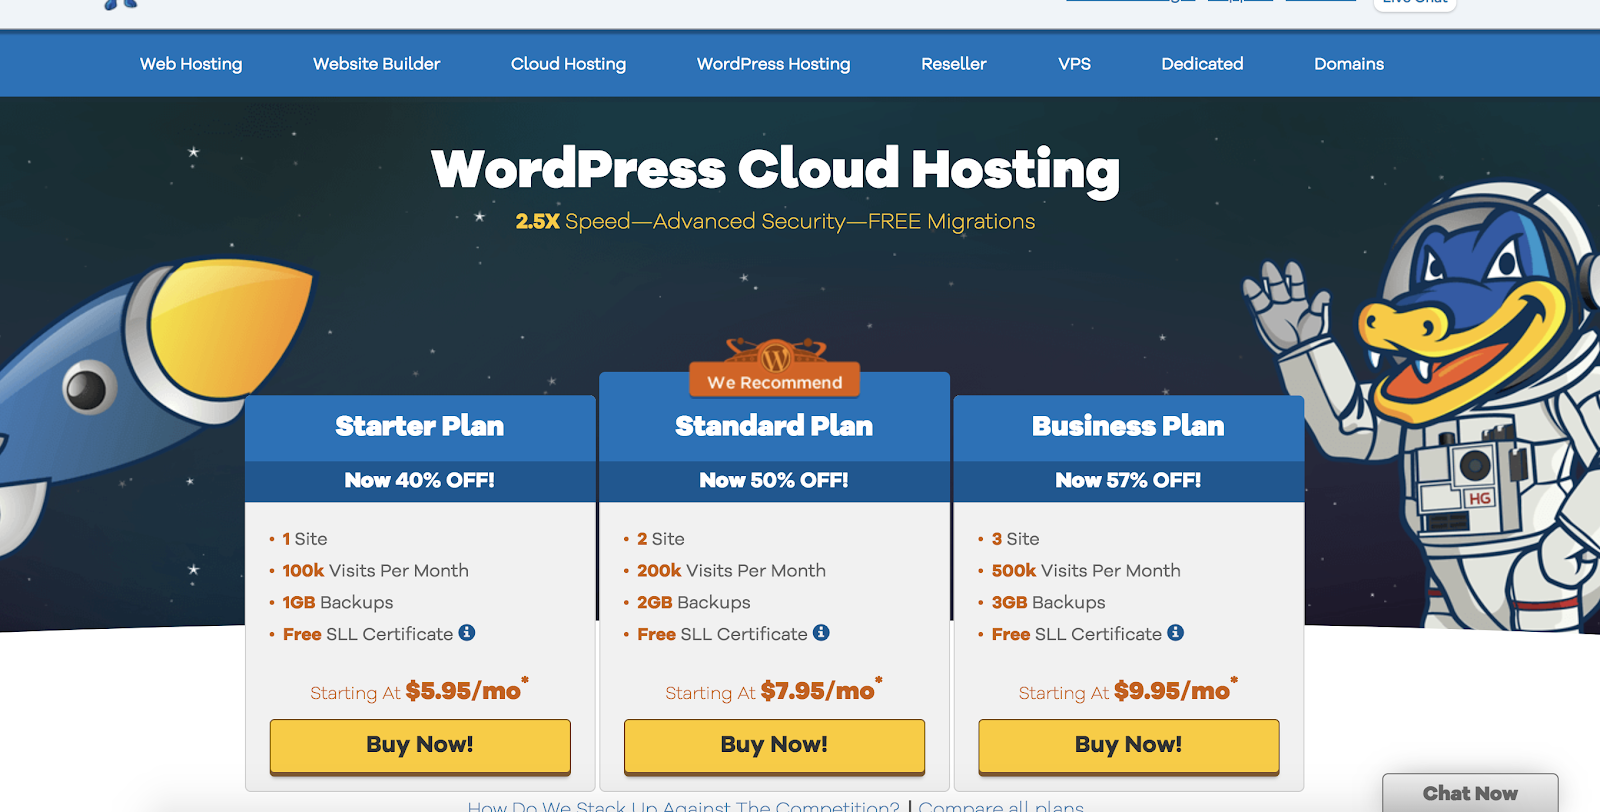
HostGator is unique because it is a cloud-based WordPress hosting provider which means it has fast load times. According to the vendor, their sites load about 2.5x the pace of sites using other providers. It also has other features including free migrations, advanced security, and a clean control panel so you can easily access all of your accounts and other hosting details.

Key takeaways:

  • Cloud-hosting provider
  • Fast load times
  • Free migrations


9. SiteGround

siteground-wordpress-hosting

Source: SiteGround

SiteGround is a managed WordPress hosting solution in which you can maintain several different websites at the same time. With SiteGround, you will receive free migrations, auto updates, and three levels of caching — setting it apart from many other providers — to ensure your website is as fast as possible. You also have access to 24/7 expert support to help you through any challenge you may experience.

Key takeaways:

  • Managed hosting
  • Auto updates
  • Three levels of caching


10. A2 Hosting

a2-wordpress-hosting

Source: A2 Hosting

A2 is a unique provider because it allows you to choose between shared and managed hosting for your website. Shared hosting is suitable for a wide range of business types and, therefore, typically comes at a lower price — that’s because it meets the needs of a wider variety of businesses than managed website hosting does.

Managed hosting, as discussed earlier, is more tailored to certain business’ specific needs and includes advanced services. The good news is whether you choose shared or managed hosting, you will still have fast loading speeds, auto-setup, free SSL, and global servers included with A2.

Key takeaways:

  • Shared hosting available for general usage
  • Managed hosting available with more advanced services
  • Fast loading speeds and auto-setup come standard


11. iPage
ipage-wordpress-hosting

Source: iPage

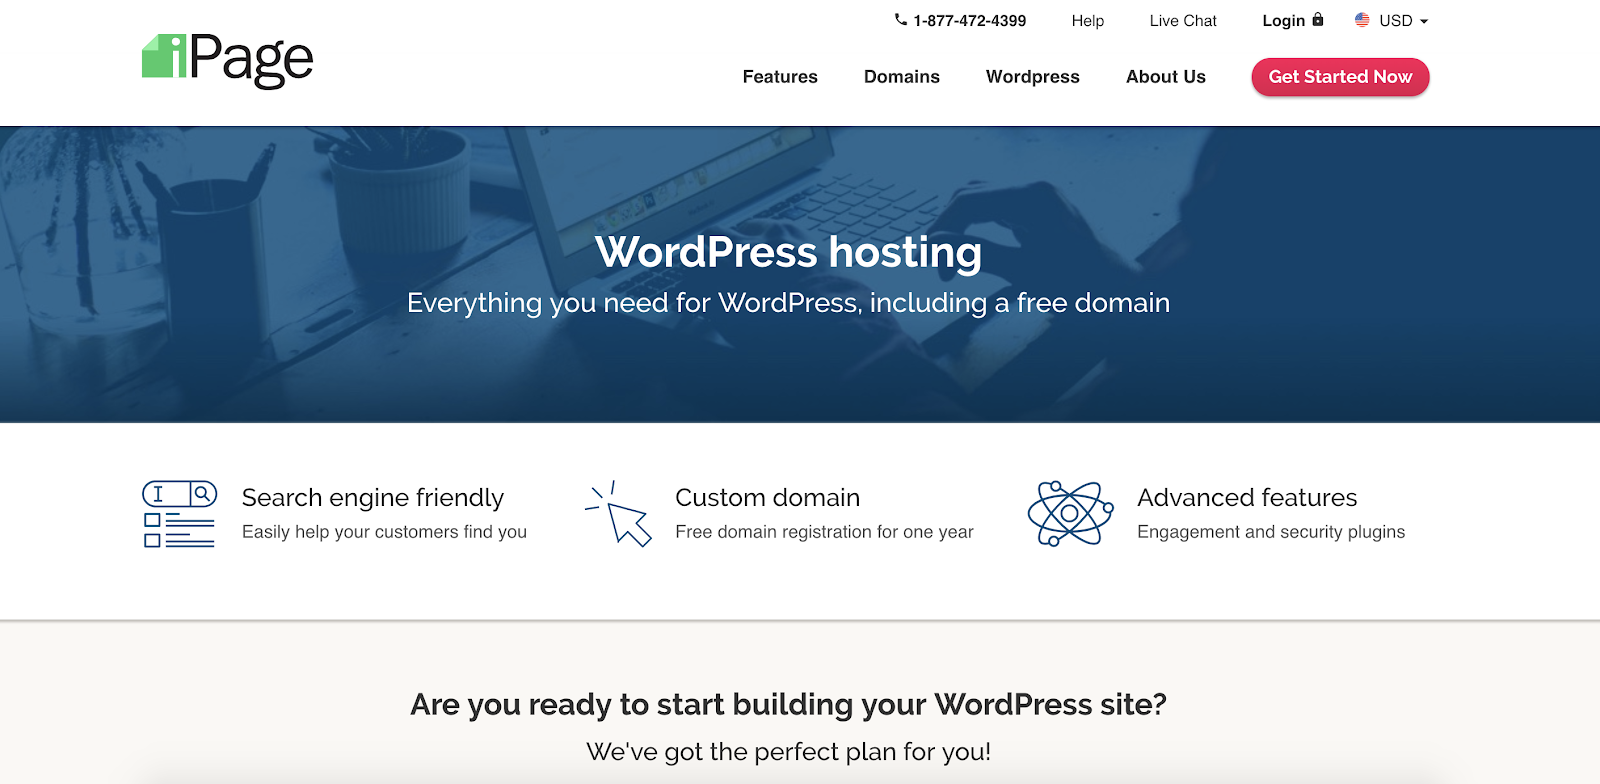
iPage is a provider that takes care of your technical SEO for you so your site has a larger chance of ranking on Google. Other advanced features such as engagement and security plugins are included to help you optimize your site. As for security, iPage and SiteLock teamed up to offer you a custom firewall so you’ll never have to worry about your website’s level of protection.

Key takeaways:

  • Search engine-friendly
  • Engagement and security plugins
  • Custom firewall


12. GreenGeeks 

green-geeks-wordpress-hosting

Source: GreenGeeks

GreenGeeks is a green energy web hosting provider (yes, there is an environmentally-friendly provider). With GreenGeeks you will receive automatic updates, one-click WordPress installation, security, and 24/7 expert support. Your account will also automatically be backed up every 24 hours so you’ll never need to worry about losing any of your content.

Key takeaways:

  • Green energy web hosting
  • One-click WP installation
  • Automatic backups every 24 hours


13. Site5 Hosting
site5-wordpress-hosting

Source: Site5 Hosting

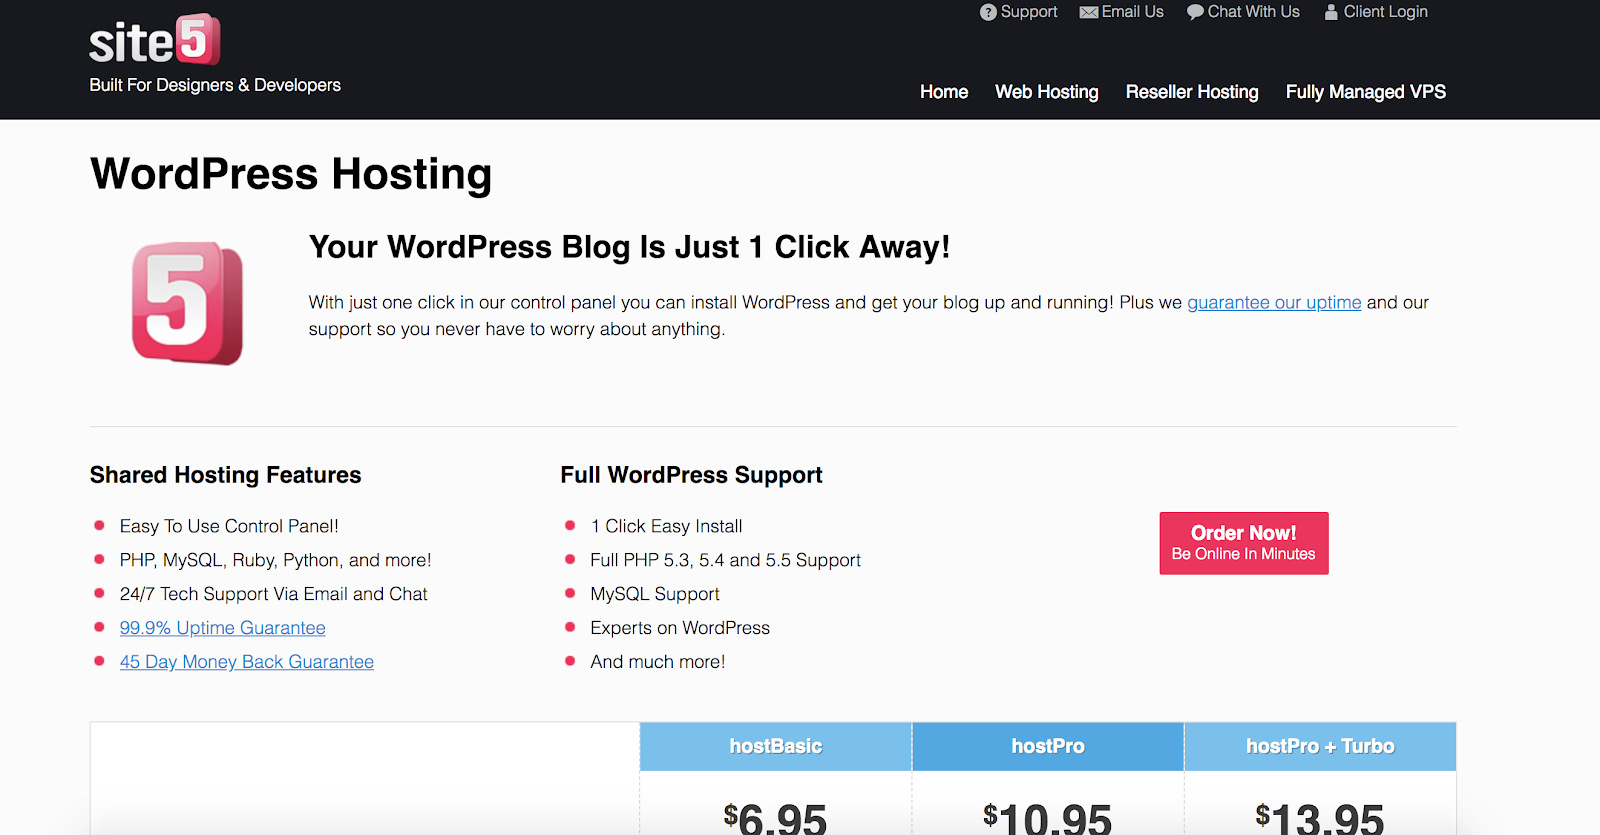
Site5 Hosting offers one-click WP installation, a control panel where you can manage your website and hosting features, a 45-day money back guarantee, and a 99% uptime guarantee (“uptime” refers to the amount of time, in a given period of time, a server takes to stay up and running … when it comes to your provider, you want that percentage to be as close to 100% as possible).

Site5 provides unique support as experts are available via email and chat so you can work through any issues by the mode of contact that is preferable to you.

Key takeaways:

  • Contact support through email and chat
  • 45-day money back guarantee
  • 99% uptime guarantee


14. Arvixe 

arvixe-wordpress-hosting

Source: Arvixe

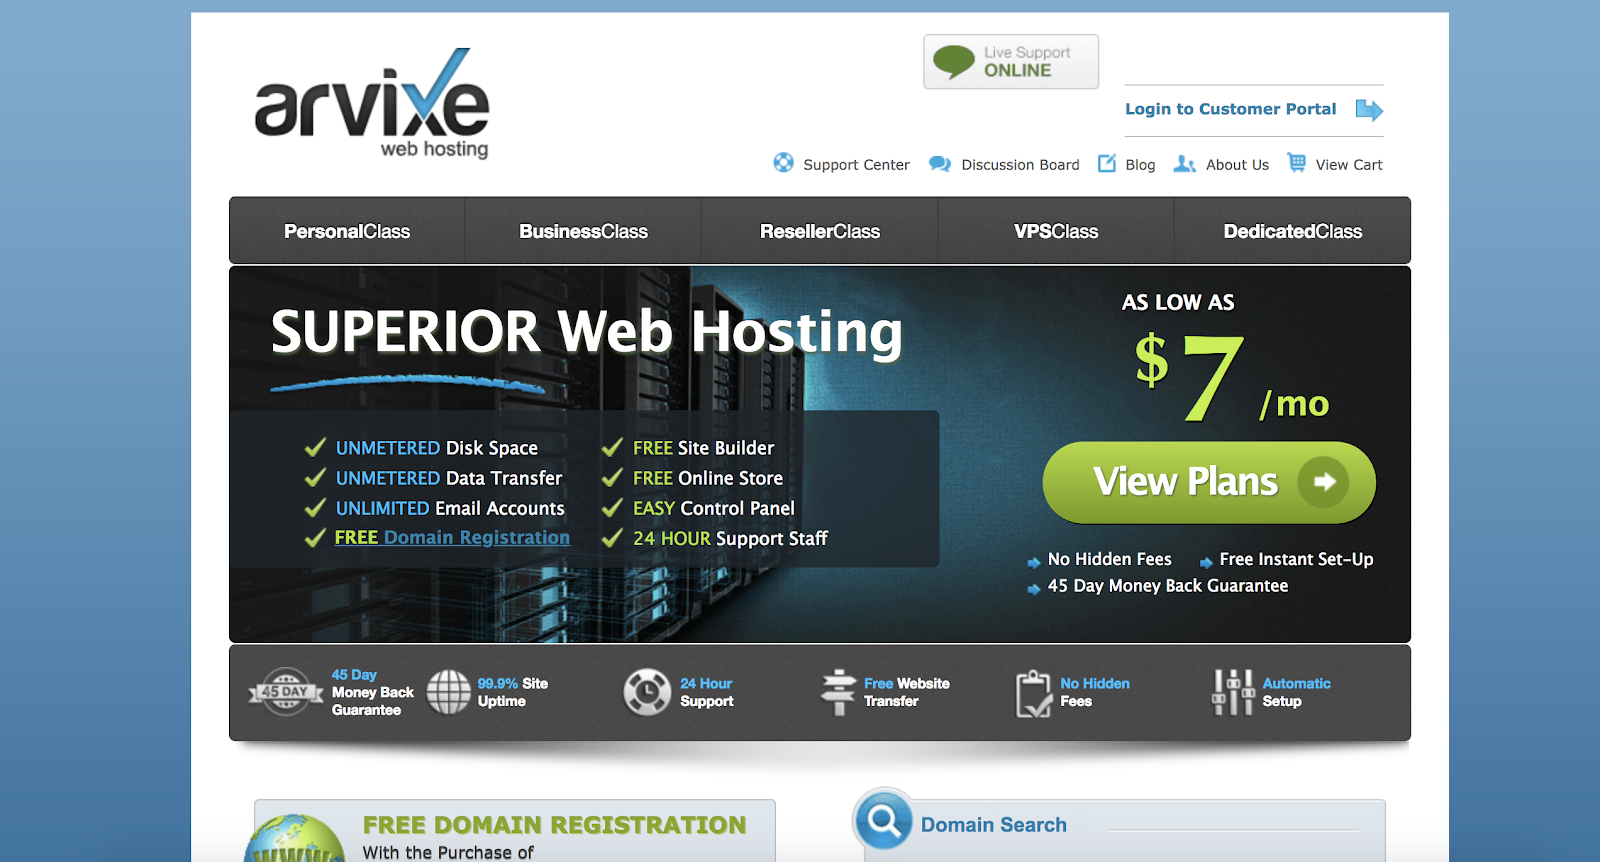
With Arvixe you’ll receive free domain registration, access to 24-hour expert support, free website transfer, and automatic setup. Arvixe also offers a 45-day money back guarantee. Arvixe takes their security measures to the next level by implementing over five different types of protection in addition to their daily backups and firewall.

Key takeaways:

  • Free domain registration
  • 45-day money back guarantee
  • Advanced security measures


15. GoDaddy 
godaddy

Source:GoDaddy

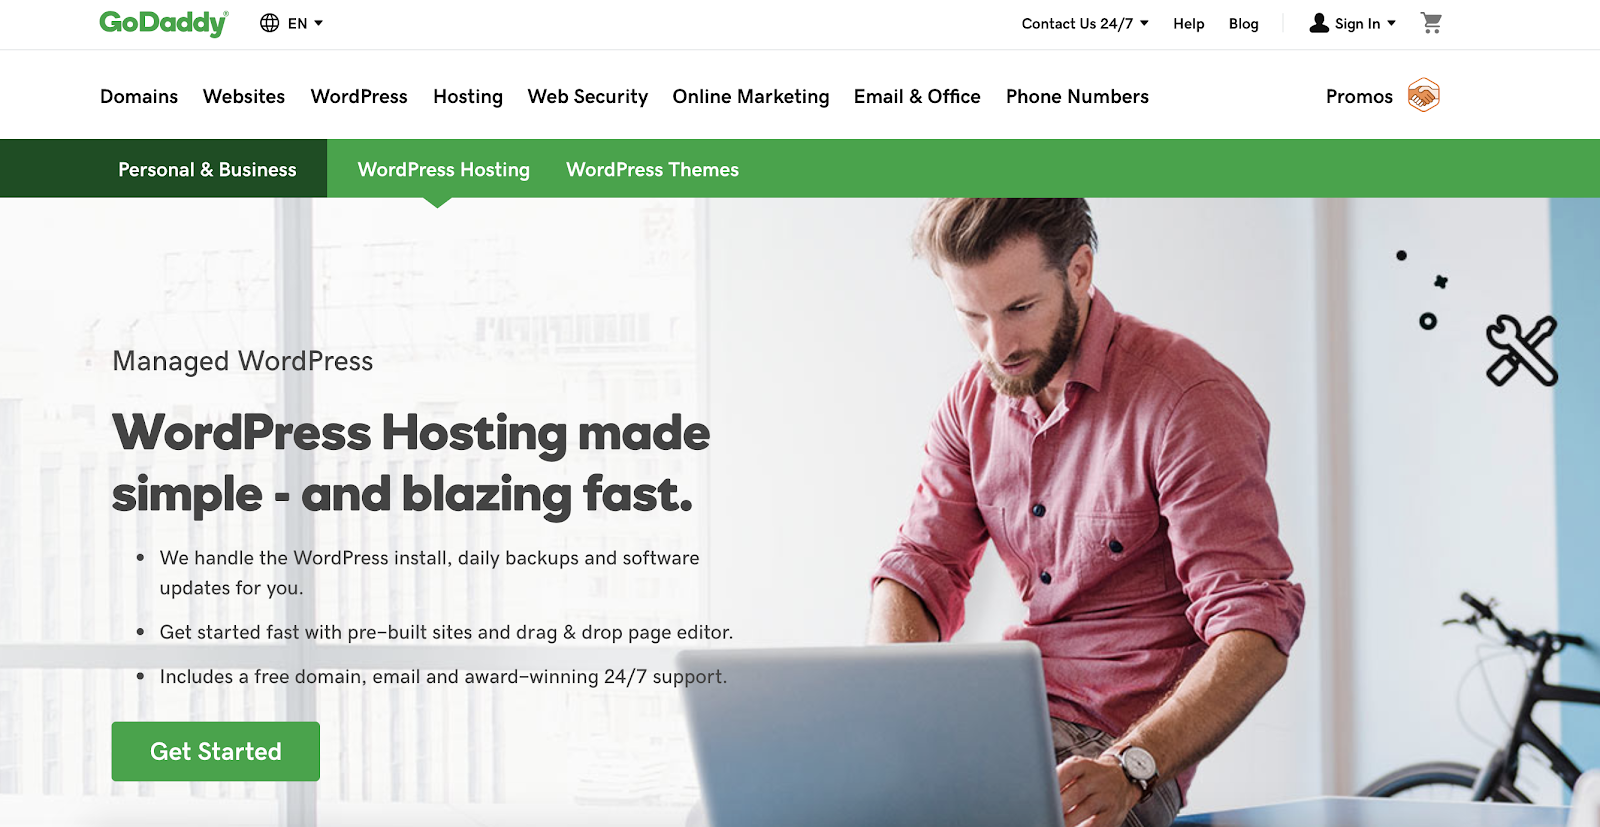
GoDaddy is unique because the provider offers a free domain and email for your WordPress website. They also handle your installation, daily backups, and software updates. GoDaddy’s compatibility with all of WordPress’ add-ons (such as their themes and plugins) makes customizing your site quick and easy.

Key takeaways:

  • Free domain and email
  • Daily backups
  • Compatible with WordPress add ons


16. TMDHosting 
tmdhosting-wordpress-hosting

Source: TMD Hosting

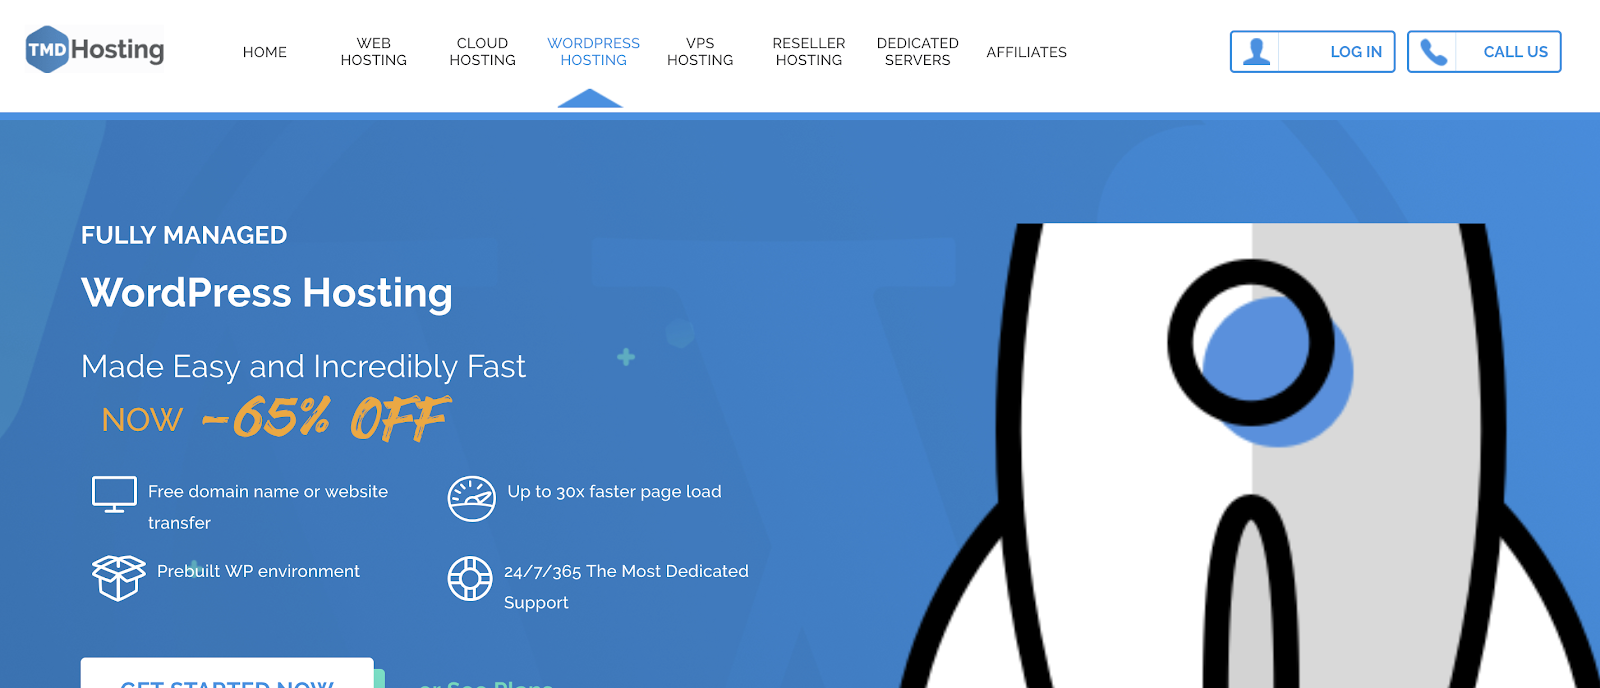
TMDHosting comes with a pre-built WP environment, so there is no work required upon installation. TMD’s three layers of cache and SSD software mean your site will load quickly. You’ll also never have to worry about security — the provider uses a unique firewall created by BitNinja which is updated daily by system administrators to ensure maximum protection.

Key takeaways:

  • Pre-built WP environment
  • Fast loading times
  • BitNinja firewall


17. 1&1 Hosting

1&1-hosting-wordpress-hosting

Source: 1&1 Hosting

1&1 Hosting is a managed provider that helps you easily and completely customize your website with the help of WordPress-compatible plugins, add-ons, and themes. 1&1 introduced their very own WP Assistant which guides you through your WordPress installation and initial setup, and provides you with user guidance so all your questions are answered efficiently.

Key takeaways:

  • Managed hosting provider
  • Completely customizable
  • 1&1 WP Assistant


18. Liquid Web 

liquid-web-wordpress-hosting

Source: Liquid Web

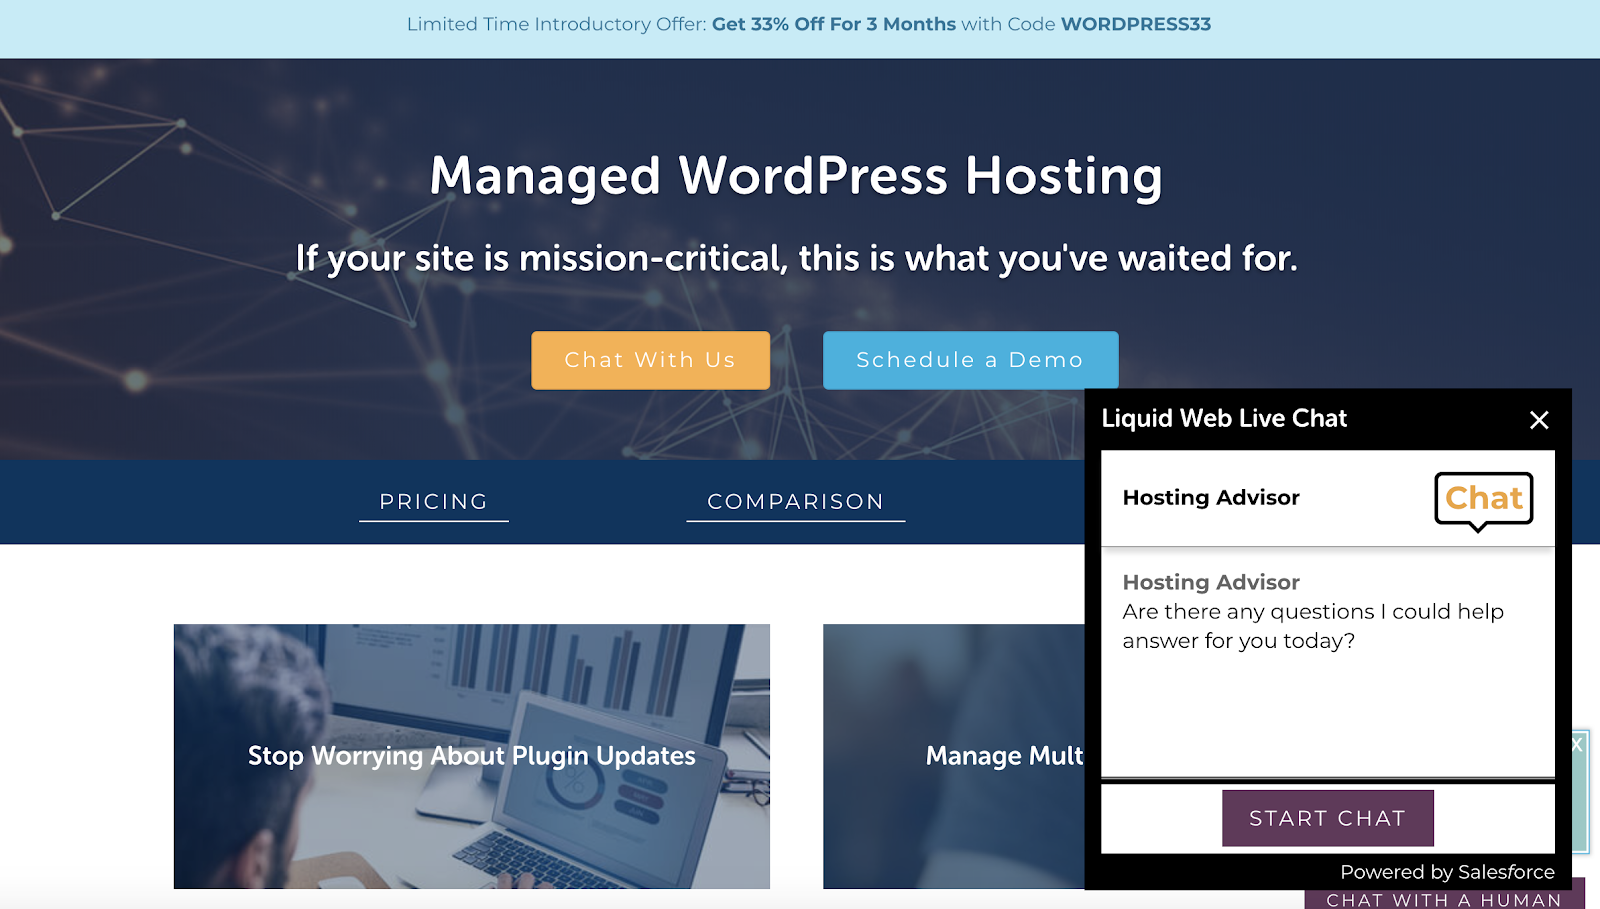
With Liquid Web’s managed WordPress website hosting, you can oversee multiple sites at once. The provider’s automatic updates differ from that of other providers because they happen in a separate environment which prevents any conflict between them and your site (which could significantly slow down your site). Liquid Web automatically compresses all of your images, which is a feature unique to the provider, to keep your site efficient.

Key takeaways:

  • Managed WordPress website hosting
  • Automatic updates for your plugins
  • Compresses all of your images


19. Pagely 

pagely-wordpress-hosting

Source: Pagely

Pagely is a managed WordPress provider equipped with a modern hosting stack and SSL acceleration, both of which make your site faster. Pagely is backed by expert support that is available to you 24/7 so you’ll never feel lost or confused.

Pagely is also unique because it backs your website with AWS, or Amazon Web Services, which provides your site with scalability and redundancy, so there is automatic back up and replacement in the case of any website system failure.

Key takeaways:

  • Modern hosting stack and SSL acceleration
  • 24/7 customer support
  • Backed by AWS

Back To You

Whether you’re looking for speedy loading times, 24/7 support, managed or shared hosting, or daily backups, there is a WordPress hosting provider that will fit your needs. The good news is several of the options mentioned above have free trial periods and money back guarantees that will allow you to determine which option is the best fit for you and your business. Get started by picking your hosting provider so you can begin creating your dream website today.


from Marketing https://blog.hubspot.com/marketing/best-wordpress-hosting

How to Use WordPress: Ultimate Guide to Building a WordPress Website

The thought of creating your own website may seem overwhelming.

You might even think this task would be impossible for anyone but a developer or a person with a background in web design.

Well, I have good news for you — there’s a software out there that’s so easy to use, virtually anyone can successfully create a unique and professional-looking website for their business, blog, portfolio, and more. It’s called WordPress.

But how?

This ultimate guide will cover a basic step-by-step process of creating your own WordPress website as well as a list of tips and tricks to remember while working with WordPress.

But first, let’s answer the question most people have when they begin thinking about their new WordPress website: What is the difference between WordPress.org and WordPress.com?

Wordpress.org vs.WordPress.com

The difference between WordPress.org and WordPress.com has to do with who is actually hosting your website.

You host your own website or blog on WordPress.org, through a third-party hosting provider. You also have to download your WordPress software, buy a domain name on a third-party site, and manage your server. It’s a much more hands-on experience than with WordPress.com. Also, your URL with a WordPress.org site will look like this: www.mywebsite.com.

WordPress.com offers to host your website for you. You also don’t need to download any software or manage a server. If you choose WordPress.com, your website’s URL will look like this: www.mywebsite.wordpress.com. However, you have the option to also upgrade your WordPress.com account and buy a custom domain from a third-party provider (meaning your URL will look like this: www.mywebsite.com).

How to Choose Between WordPress.org or WordPress.com

You may be wondering whether WordPress.org or WordPress.com would be a better fit for you. Let’s review a few more of the pros and cons that come with both options so you can make an informed decision.

Wordpress.org is ideal if you want full power over customizing and controlling your website. However, there is a lot more responsibility that comes with managing a WordPress.org website site. You have to purchase and set up your own domain name, upload and install all of your custom plugins and themes, edit your website’s code, and manage your website’s security. WordPress.org is free to use, but you have to pay for everything else that goes into having a website (including but not limited to everything I’ve just listed).

WordPress.com is preferable if you’re looking for an option that has most of the hard work done for you. You’ll never need to manage your server, pay for your hosting, or buy a domain. There are also a number of customization options that come with a WordPress.com plan to help you make your website look the way you want it to.

WordPress.com has a free and paid version. If you stick with the free version, you can’t upload any custom themes or plugins, and you will have a WordPress subdomain. However, there is always the option to pay for premium upgrades and other plans that provide you with even more features and control, as well as the option to buy a custom domain through a third-party site.

WordPress for Beginners: How to Use WordPress

There are a number of ways for you to create your dream website with WordPress. Users generally find the software easy to use, but getting started can be understandably intimidating if you’re completely new to the process.

That’s why we have built this “WordPress for beginners” guide. Below, we will cover how to start creating your website.

How To Create A WordPress Website

WordPress is one of the most popular CMS options available today according to TechRadar. Its ease of use and versatility enable the majority of users and business owners to create a website that works for their needs with the software. Here’s how you can do the same.

1. Pick a WordPress plan

To begin creating your website, pick a WordPress plan. As stated earlier, with WordPress.org, you only have one (free) plan option — but it requires you to buy your domain, hosting provider, plugins, themes, and everything else related to your WordPress site.

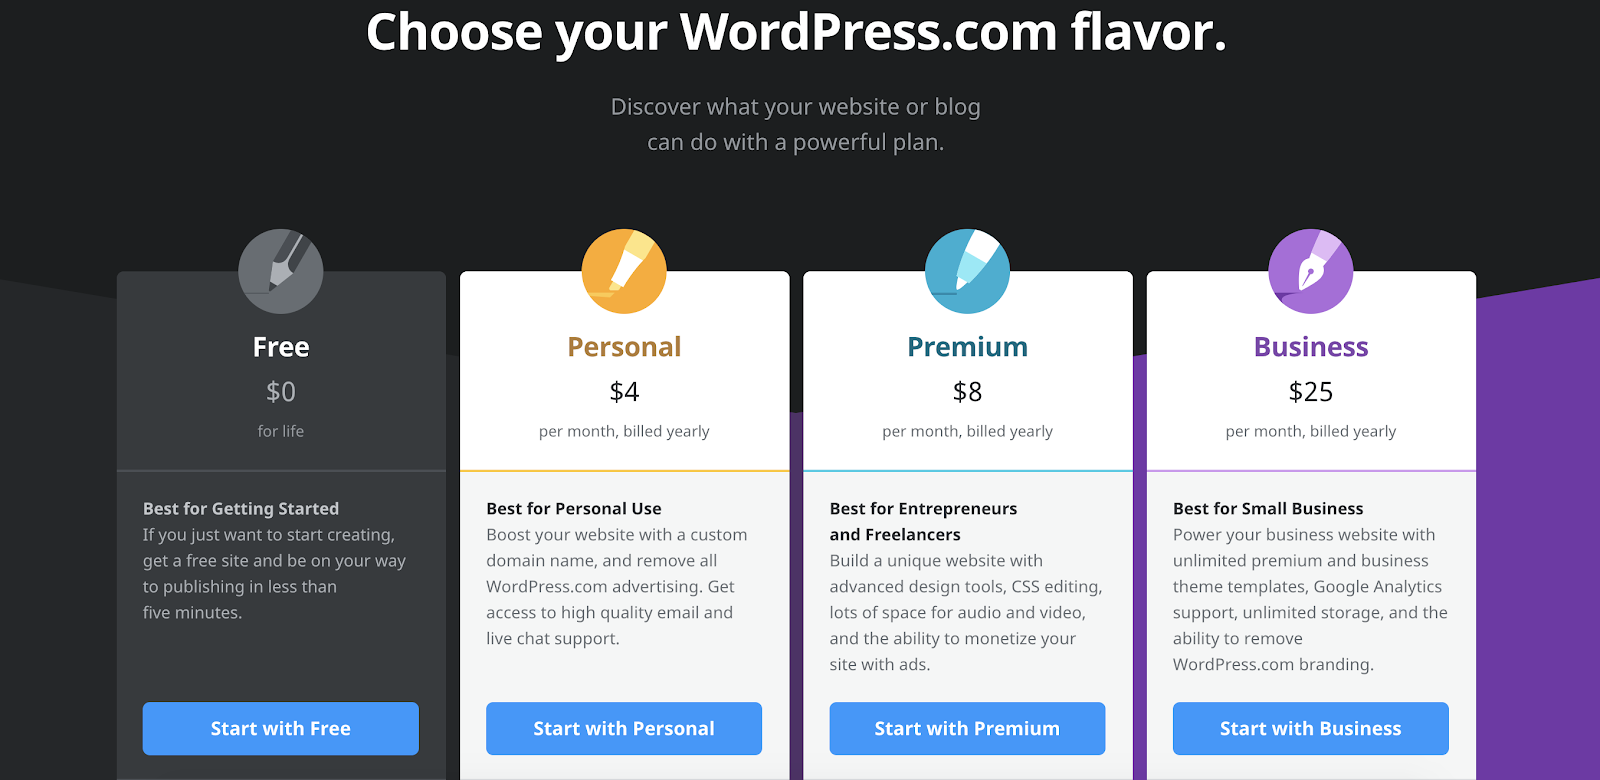
When it comes to WordPress.com, you’ll have to choose between the four plans they offer.

wordpress-plans
SourceWordPress

The main differences between the four plans include the monthly fee, your ability to create a custom domain, and their number of features.

2. Set up your domain name and hosting provider

Setting up your domain name and choosing your hosting provider typically happen around the same time in the website creation process.

Before we talk about how to complete those tasks, let’s cover the difference between your domain name and hosting provider.

Think about your domain name as your home address — it’s how your visitors are able to locate your website on the internet. Your hosting provider is where your website is actually stored. Without a hosting provider, your site wouldn’t have space on a server to “live”.

To put it in simpler terms: Imagine your domain name is your home address and your hosting provider is your house. Your data files, which make up your website, are the furniture in your house.

Your domain name will look something like this: www.example.com. An example of a popular hosting provider is WP Engine, which you can learn more about here.

wp-engine

Source: WP Engine

How to pick domain and hosting providers

Again, WordPress.org requires you to create your own domain and find a third-party hosting provider for your website. WordPress.com allows you to decide whether or not you want a custom domain depending on the plan you choose, but you will still have to find a third-party hosting provider.

There are hundreds of third-party hosting services, such as GoDaddy or Bluehost, that provide you with the ability to create custom domain names. (Again, this is why so many people pick their domain and hosting provider at the same time in the website creation process.) Your hosting provider is important — not just because it’s how you host your site — but because it impacts your website’s speed, security, reliability, and more.

There are hundreds of hosting providers to choose from, but the good news for you is we put together a list of 19 of the best WordPress hosting providers to help you decide what will work best for your own website. All 19 of these providers meet WordPress’ three hosting requirements (listed below). If you still have an interest in looking at other hosting providers for your site, make sure they meet the following criteria:

  • PHP version 7.2 or greater
  • MySQL version 5.6 or greater OR MariaDB version 10.0 or greater
  • HTTPS support

Side note: If you are new to WordPress.com but have already purchased and created a domain name elsewhere, no problem — you’ll have the option to transfer or map it to your WordPress website.

For the sake of this guide, let’s assume you do not have a domain or hosting provider at this point. Here’s how to start creating your website on a third-party hosting site like Bluehost.

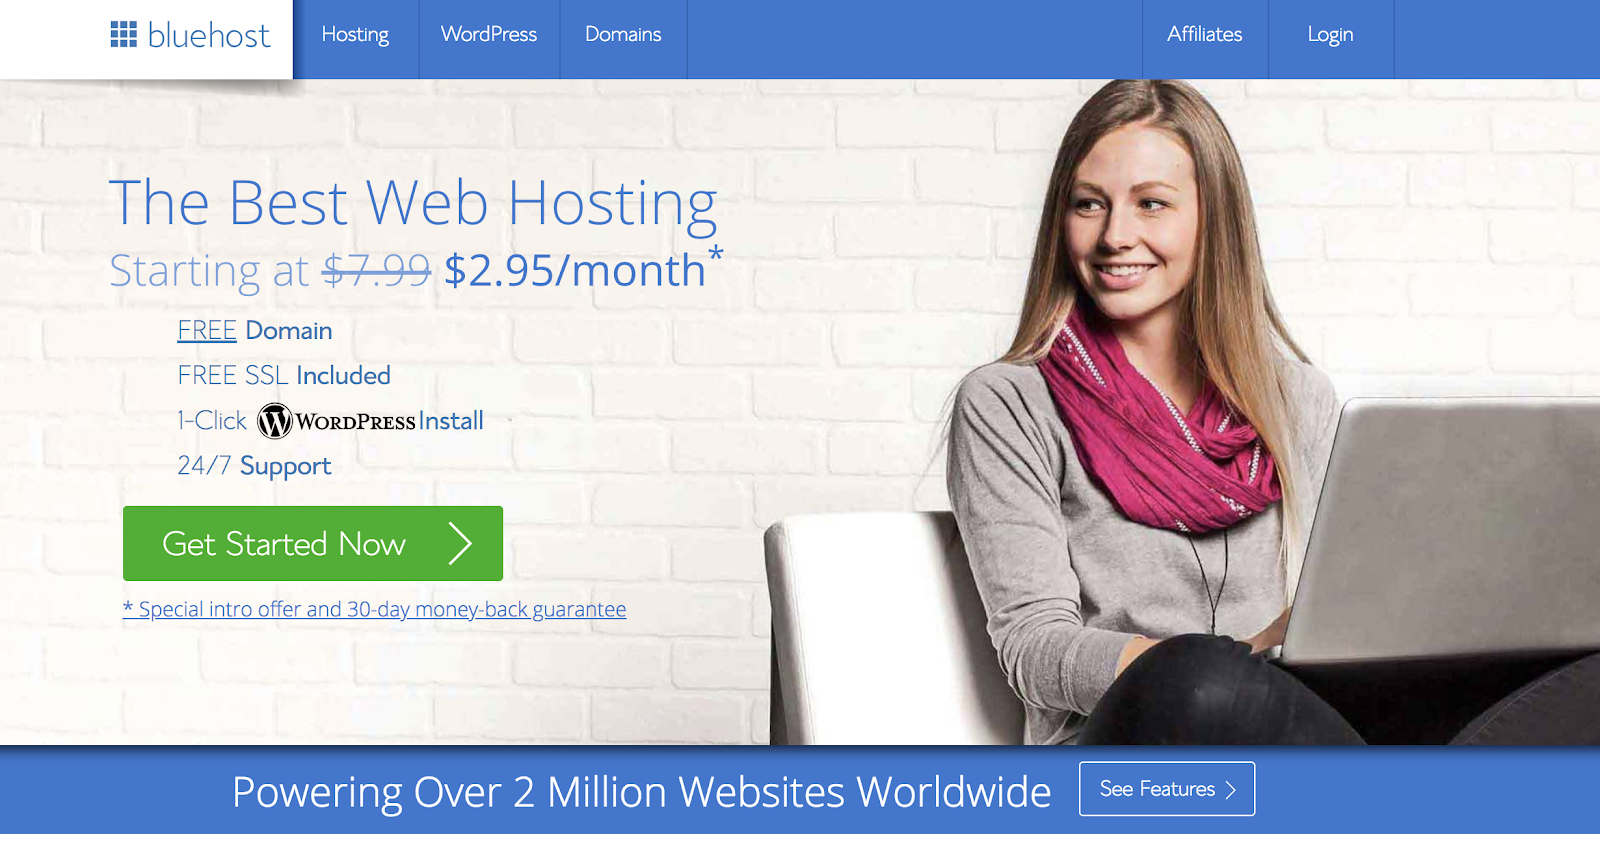
First, head to Bluehost’s website and click “Get Started”.

bluehost-wordpress-hosting
SourceBluehost

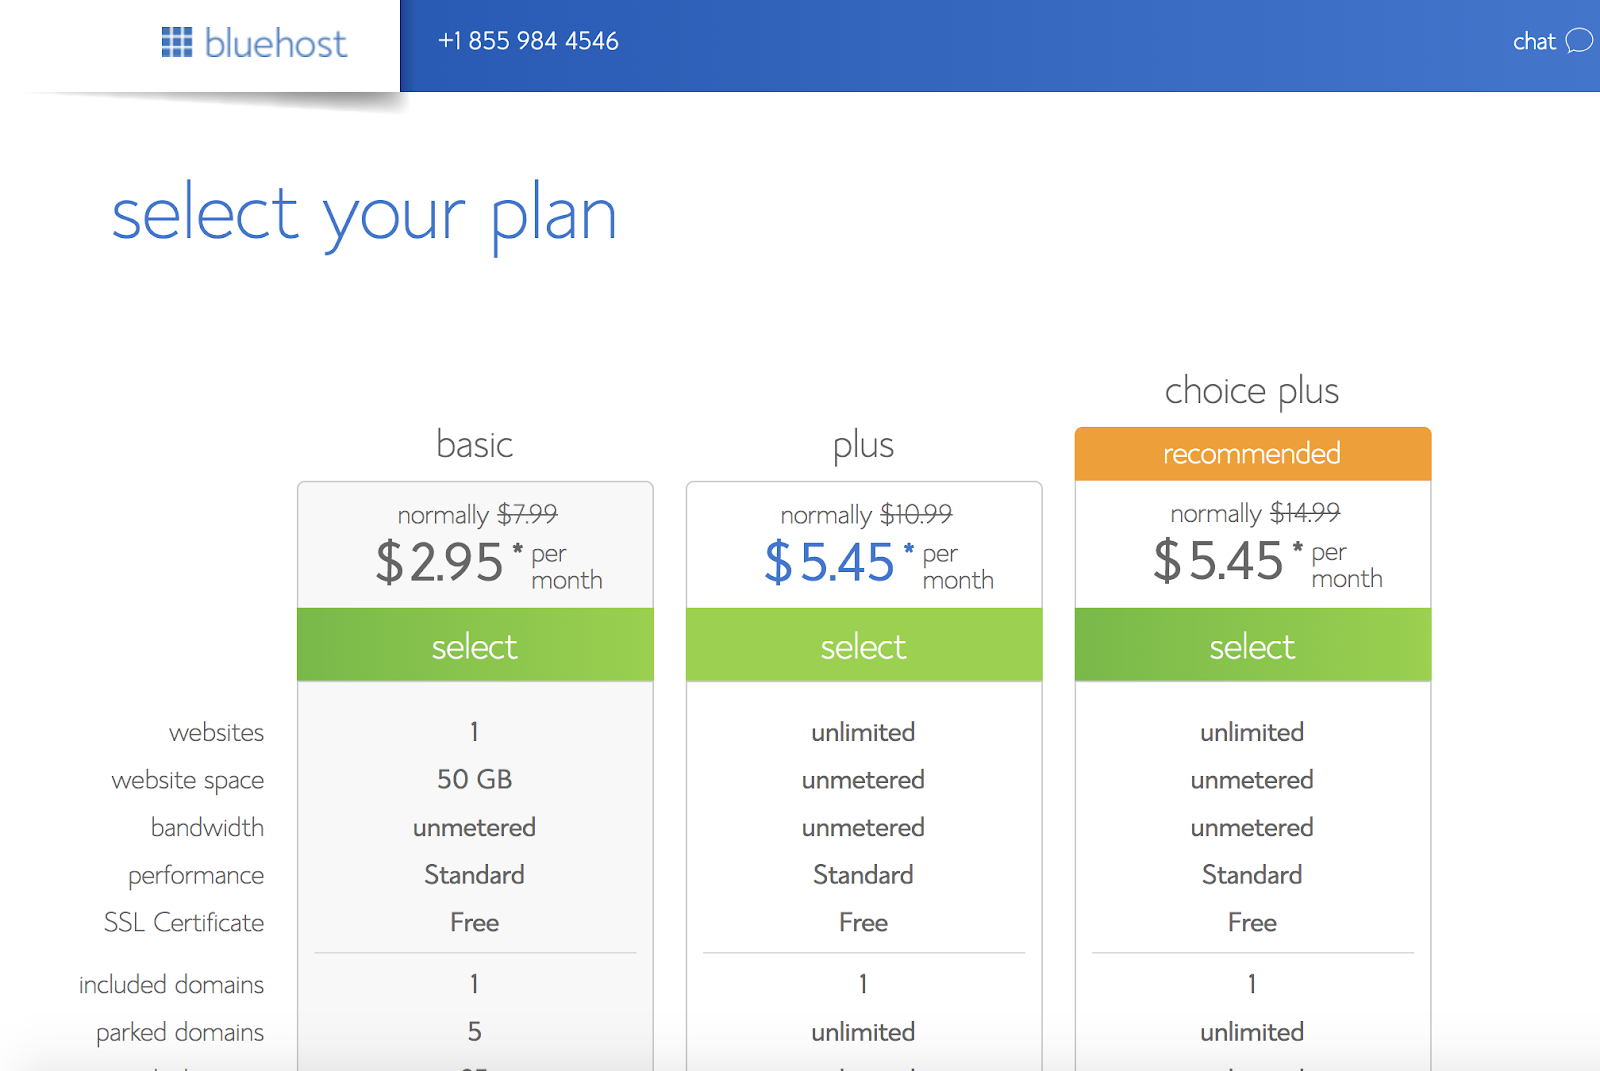
From here, you’ll be taken to Bluehost’s pricing page to choose from three different plans.

bluehost-hosting

Source: Bluehost 

Once you choose your plan and click “Select”, you’ll be taken to another page to sign up with a domain name.

bluehost

Source: Bluehost

Once you select your domain name, you’ll be brought to a page to complete your account and billing information for your purchase.

bluehost-wordpress-hosting-provider
SourceBluehost

 After confirming your account and purchasing your domain, you will gain access to your hosting dashboard where you’ll be able to install WordPress.

3. Install WordPress

If you are using a hosting provider outside of WordPress, you’ll need to install the CMS to connect your new domain to your website.

This time, let’s use GoDaddy as an example. (Don’t worry, no matter the hosting provider you choose, this process looks exceptionally similar.)

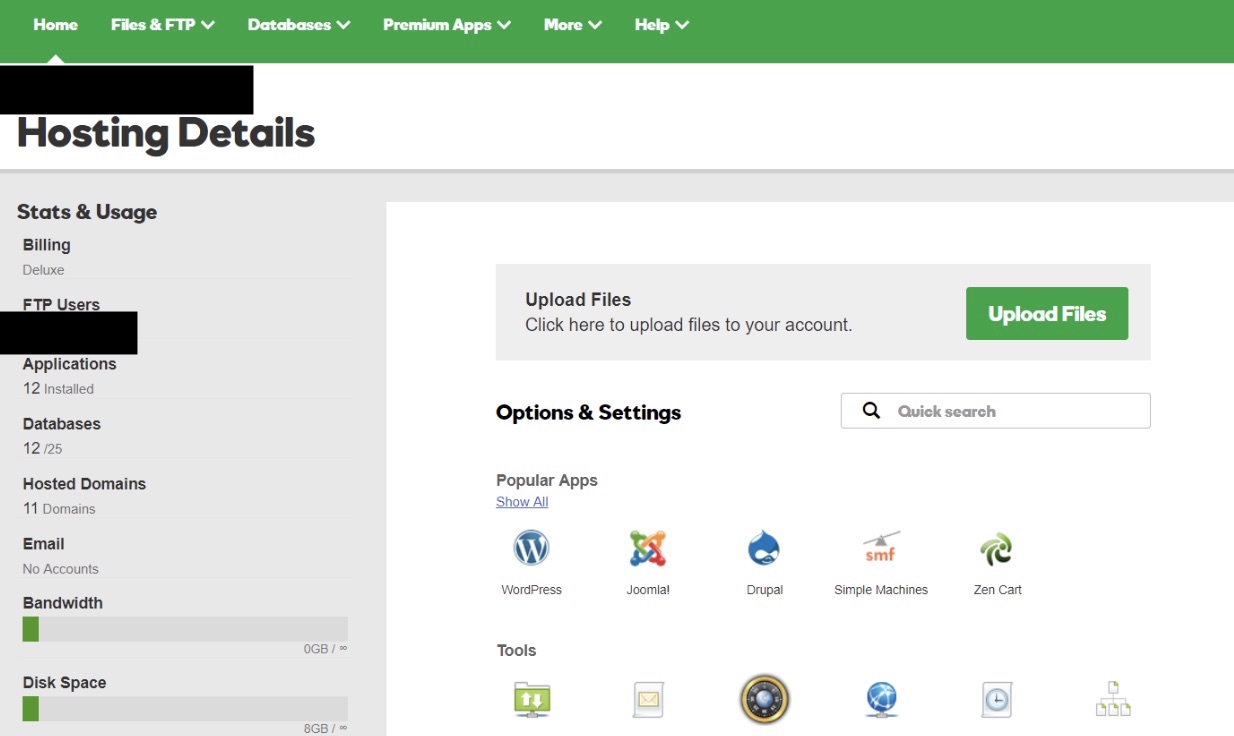
To start, log into your GoDaddy account, click “Web Hosting”, and then “Manage”. You will be brought to a screen with your account details.

godaddy-wordpress-hosting

Source: GoDaddy

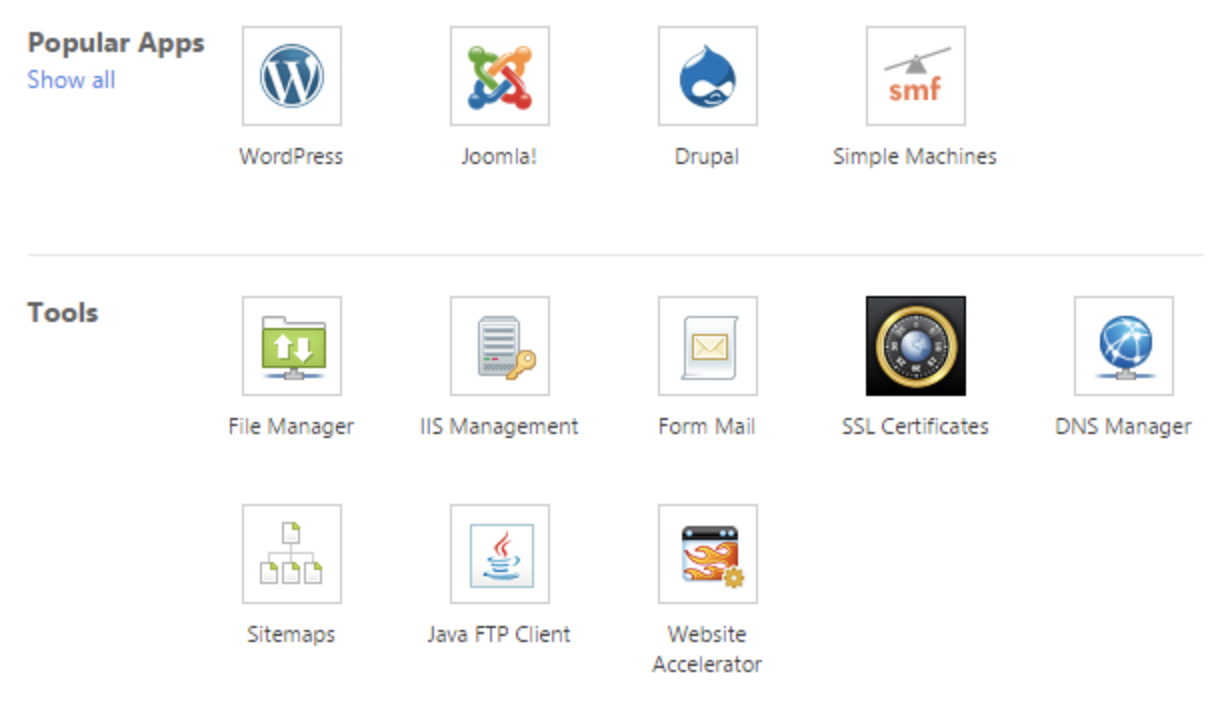
Scroll down and under “Options & Settings”, you will see an area titled “Popular Apps”. Click on the WordPress app to begin the installation.

godaddy

Source: GoDaddy

 After installing WordPress, there will be a few questions to answer related to the domain you want to use, the directory where you want to install WordPress, and your admin information.

After about 24 hours, your website will be installed to your hosting account, and GoDaddy will send you an email confirmation.

Now that you have your domain set up and WordPress installed, we need to set up your “Primary Domain” within WordPress so your visitors are actually sent to your website when they search your URL.

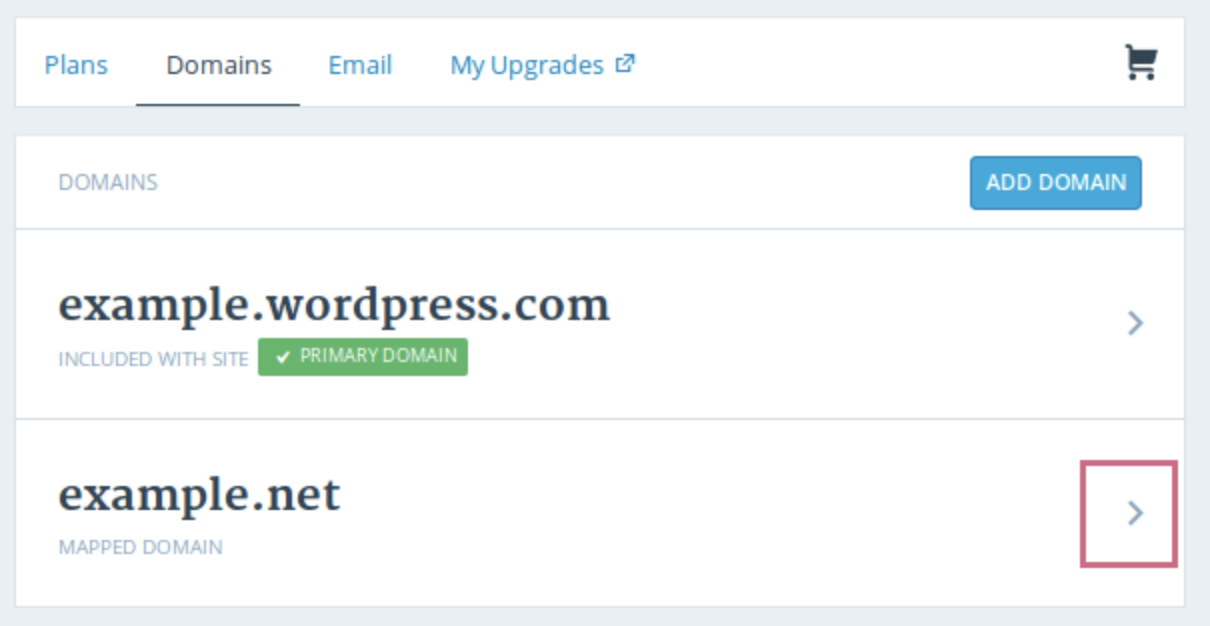
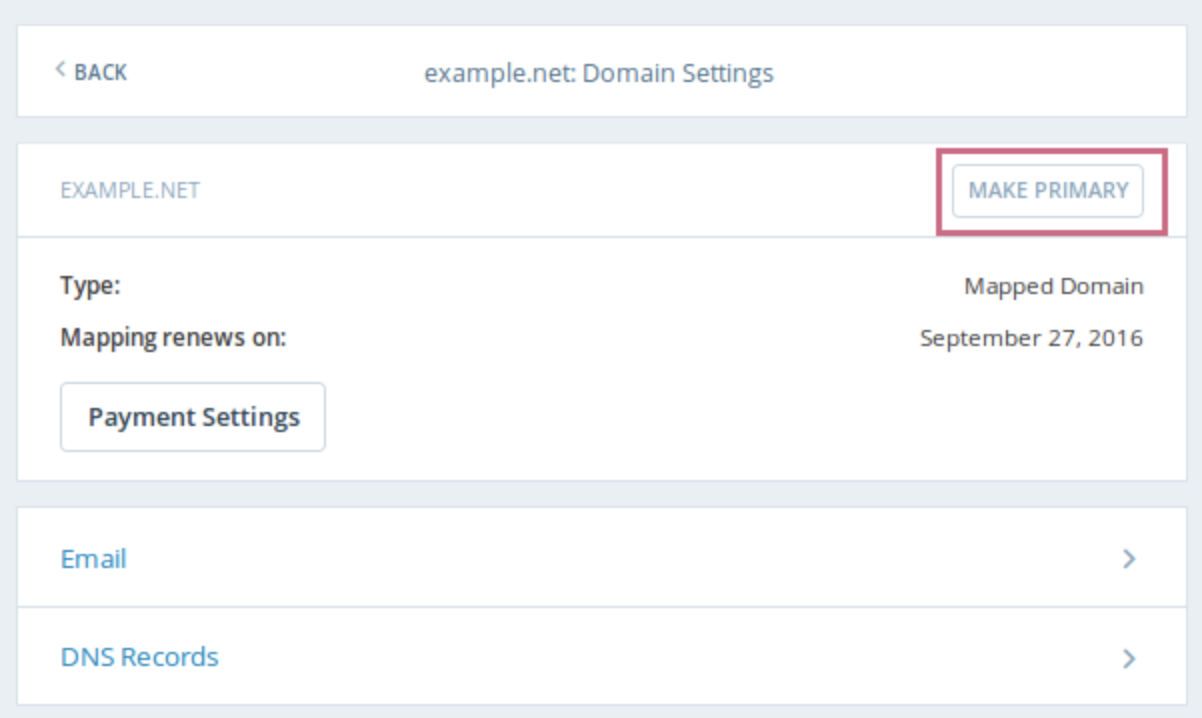
In WordPress, go to “My Site” and click “Domains”. Select the custom domain you want to make primary.

setting-up-wordpress

Source: WordPress

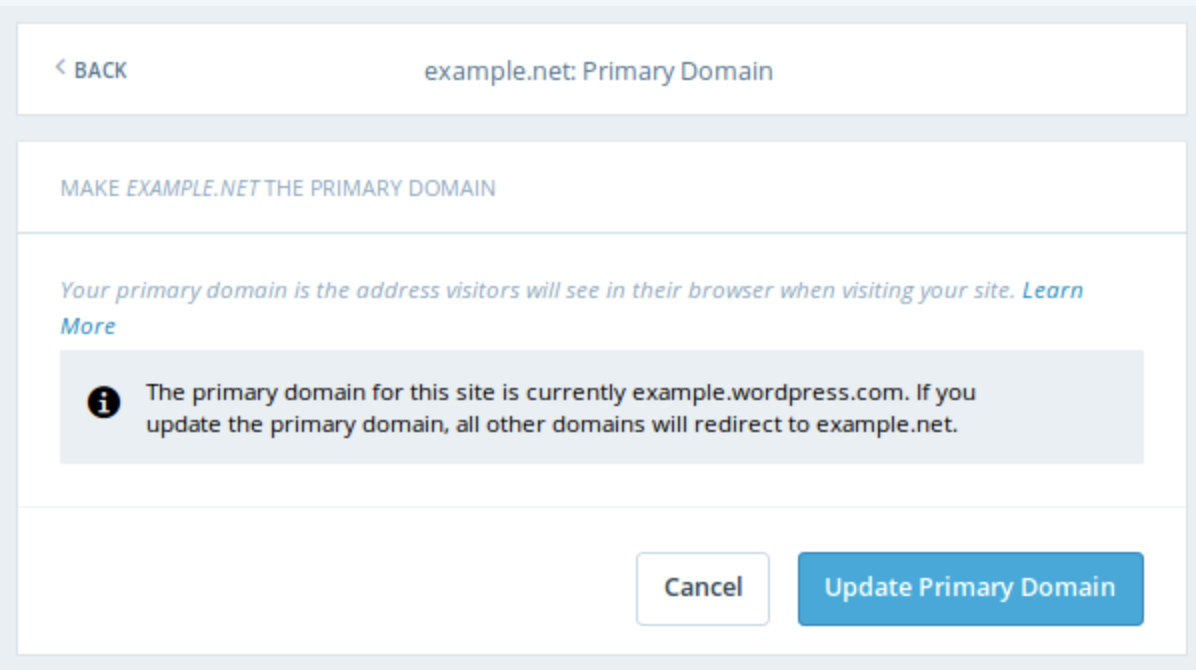
Then, click “Make Primary”.

wordpress-set-up

Source: WordPress

Confirm you meant to make this change by clicking “Update Primary Domain”.

wordpress-domain-name

Source: WordPress

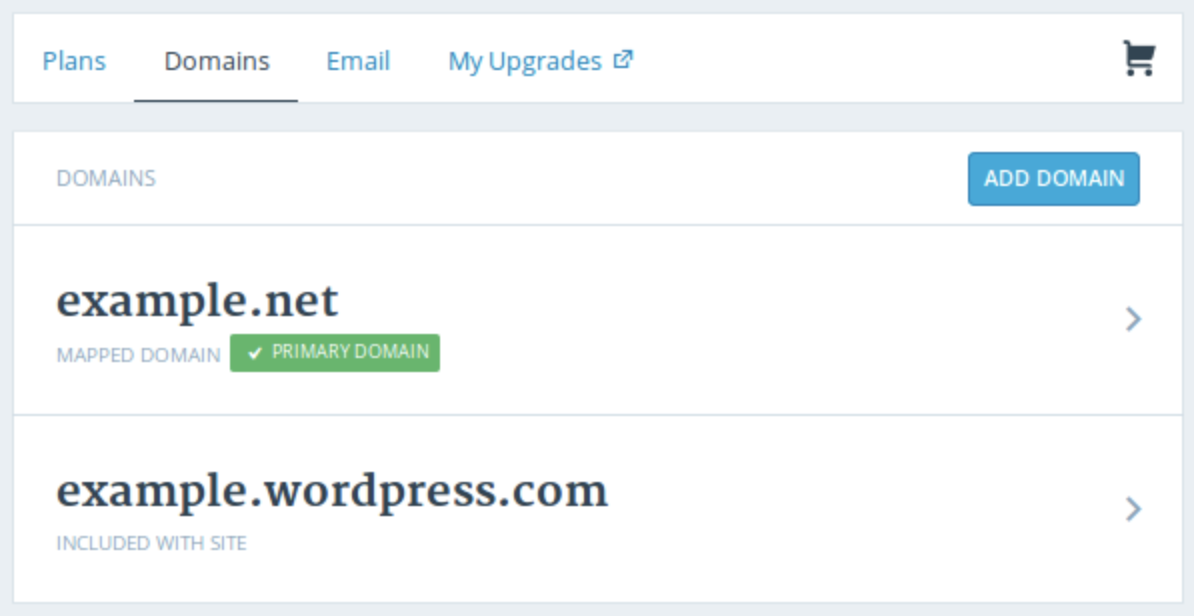
 Verify the update was successful by looking for a green box with a checkmark that says “Primary Domain”.

setting-up-wordpress-domain-name

SourceWordPress

Onto step four — making your website look nice.

4. Choose Your Theme

You can customize your website using WordPress’ themes and templates, which contain a multitude of layouts, formatting styles, colors, fonts, and other visual options.

 WordPress automatically provides you with a default theme that looks rather plain. Sure, you can keep it … but your website visitors may not be so impressed. A custom WordPress theme, whether it’s paid or free, will make your website appealing to your buyer personas as well as ensure it looks professional.

 Similar to the wide range of hosting providers available, there are also hundreds of themes and templates to choose from. That’s why we’ve put together a guide to 19 of our favorite themes and templates and categorized them by purpose. Whether you’re looking for a theme versatile enough for multiple different business types, or one suitable for your ecommerce site, portfolio, blog, or niche business, there’s a theme that will work for your specific needs.

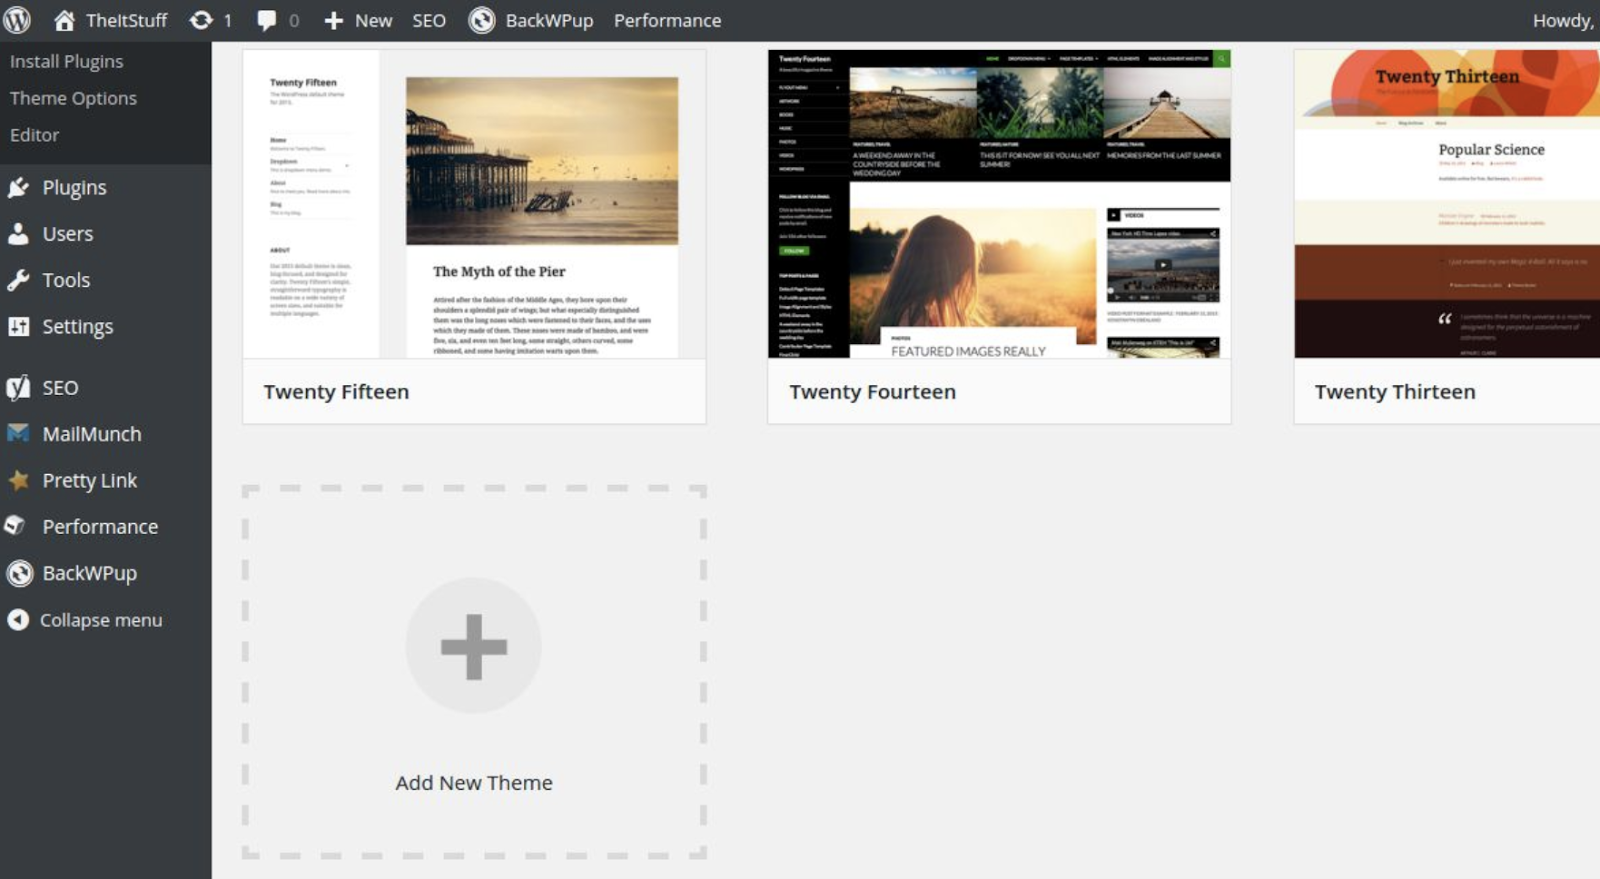
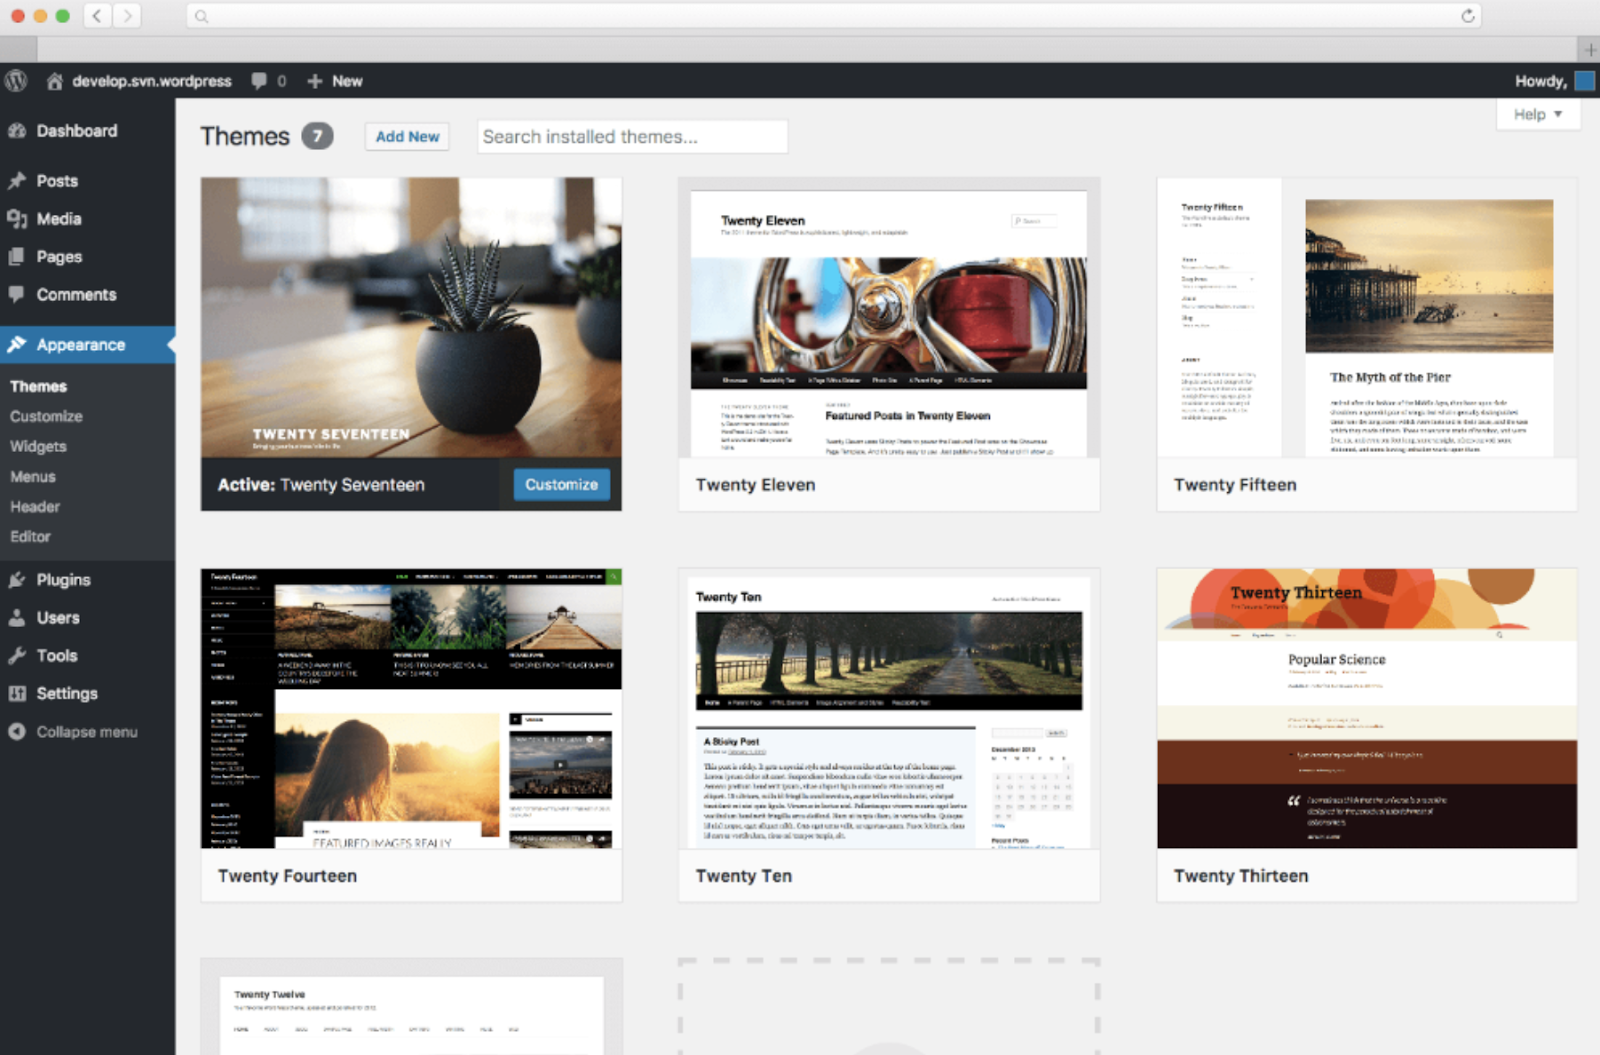
To find a theme that works best for you, head to your WordPress admin dashboard. Click “Appearance” and then “Themes”.

wordpress-themes
SourceThe It Stuff

You will then be brought to another screen to browse all available themes or search for a specific one you have in mind.

wordpress-theme-setup

Once you discover the perfect theme, simply “Install” it to begin customizing it and adding your own content, posts, and pages. Each theme has different steps required of you during the customization process, so be sure to follow them closely. Each theme’s website (which are often accessible through the WordPress theme and template library) has helpful information as you work through the customization process.

5. Add Posts and Pages to Your Website

When you add content to your WordPress website, it’s displayed in the form of posts and pages.

Posts (or “dynamic pages”) are typically used for blogs and portfolios because they automatically place your newest website content at the top. Pages are static which is why they often appeal to business owners — the added content always remains in the same place.

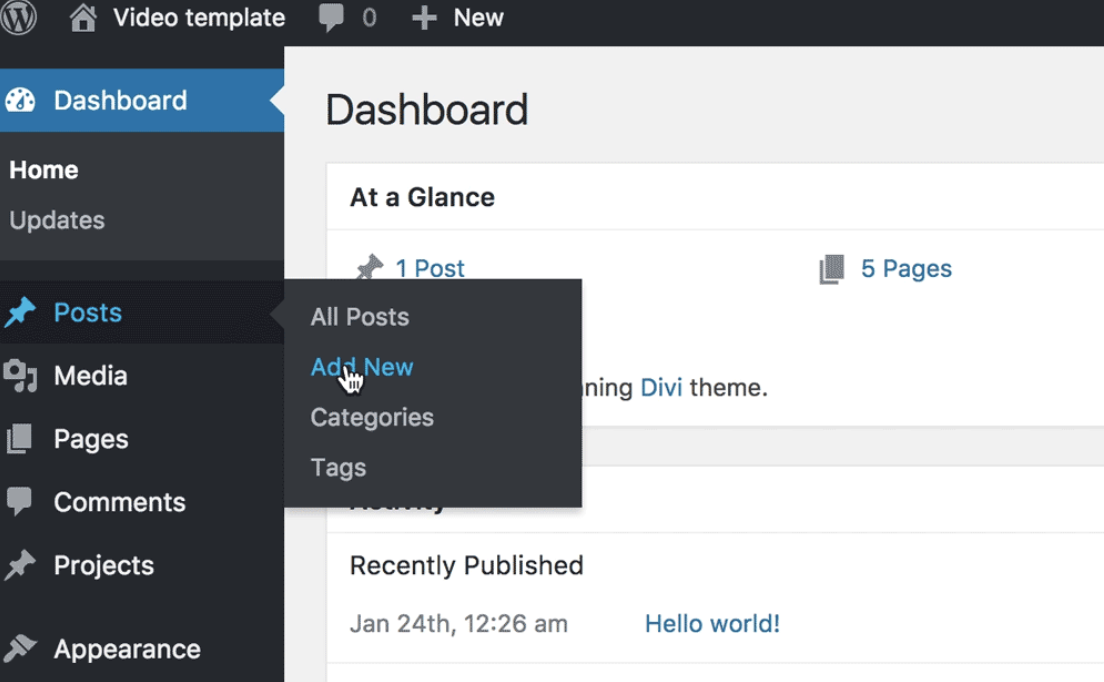
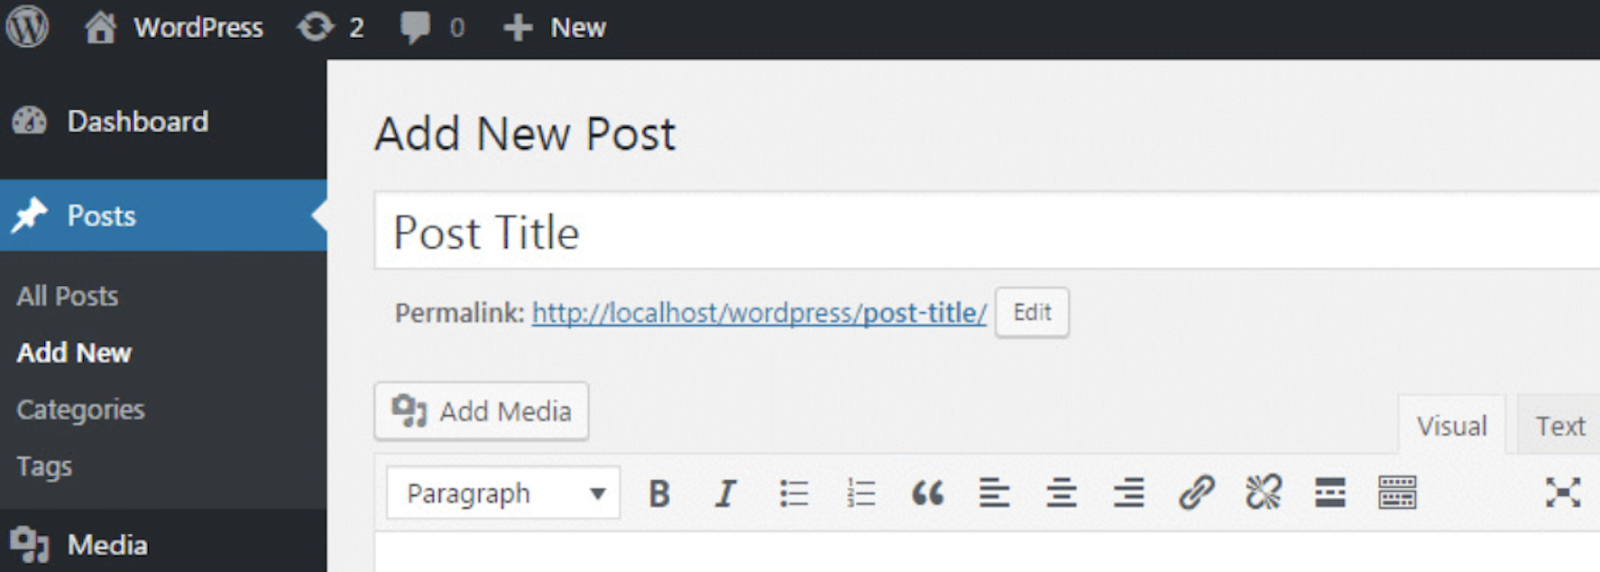
Start by deciding whether you want a post or page to serve as the homepage (or any page) of your website. To add a post to your website, go to the admin page, click “Posts” and then “Add New”. From this screen, add a title for your post, insert photos, change the format, and more.

wordpress-posts-and-pages

Source: First Site Guide

Click “Save” to save your changes as a draft or “Publish” so the post immediately goes live.

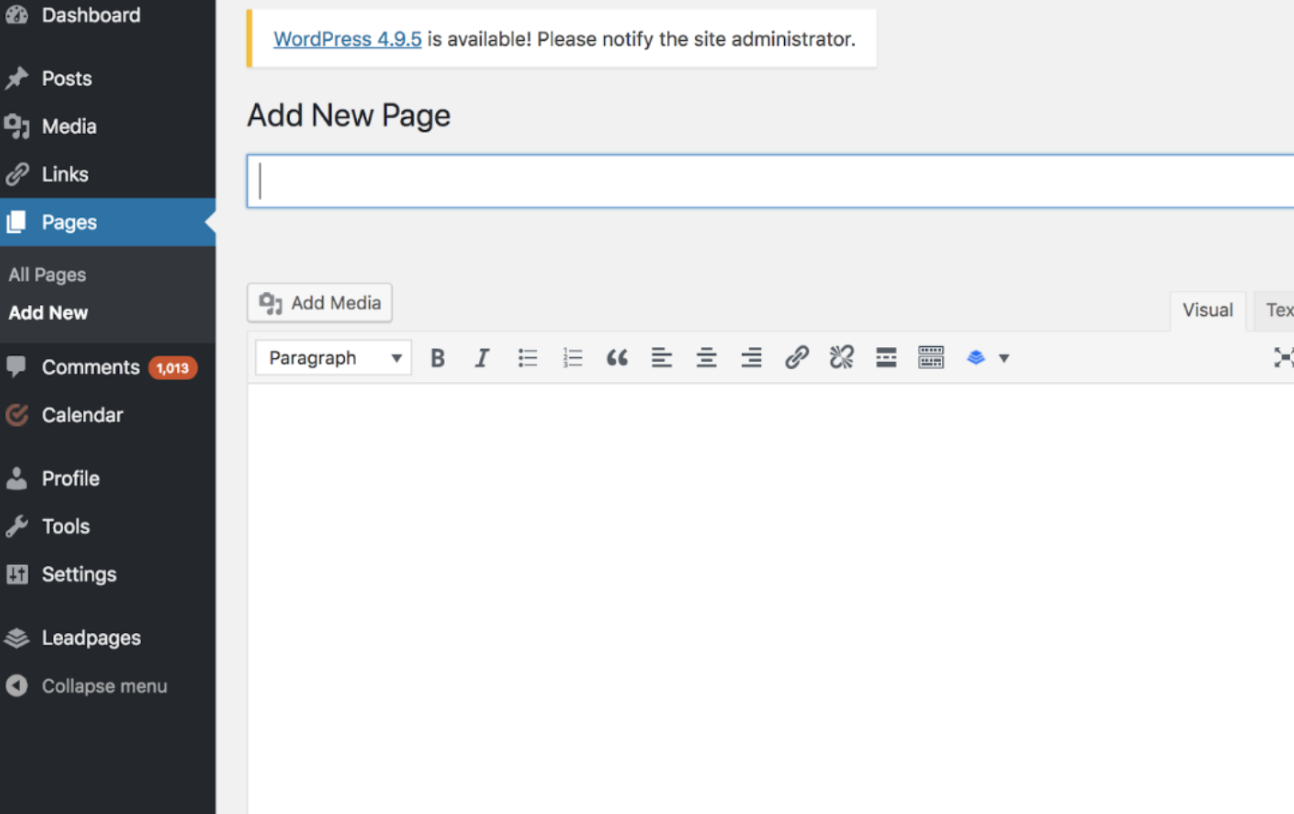
If you’re looking to add a page to your website, you’ll work through a very similar process. In your admin area, click “Pages” and then “Add New”.

wordpress-posts

First, add a title to your page. Next, insert photos, embed videos, add written content and links, and more.

create-wordpress-postSource: The Hard Refresh 

Follow the same steps to create multiple pages for your website if you choose.

wordpress-posts

Source: The Hard Refresh

Click “Save” to save your changes as a draft or “Publish” so the page immediately goes live.

6. Customize Your Website

There are a number of ways to further customize your website. Let's review a few of the more common customization options.

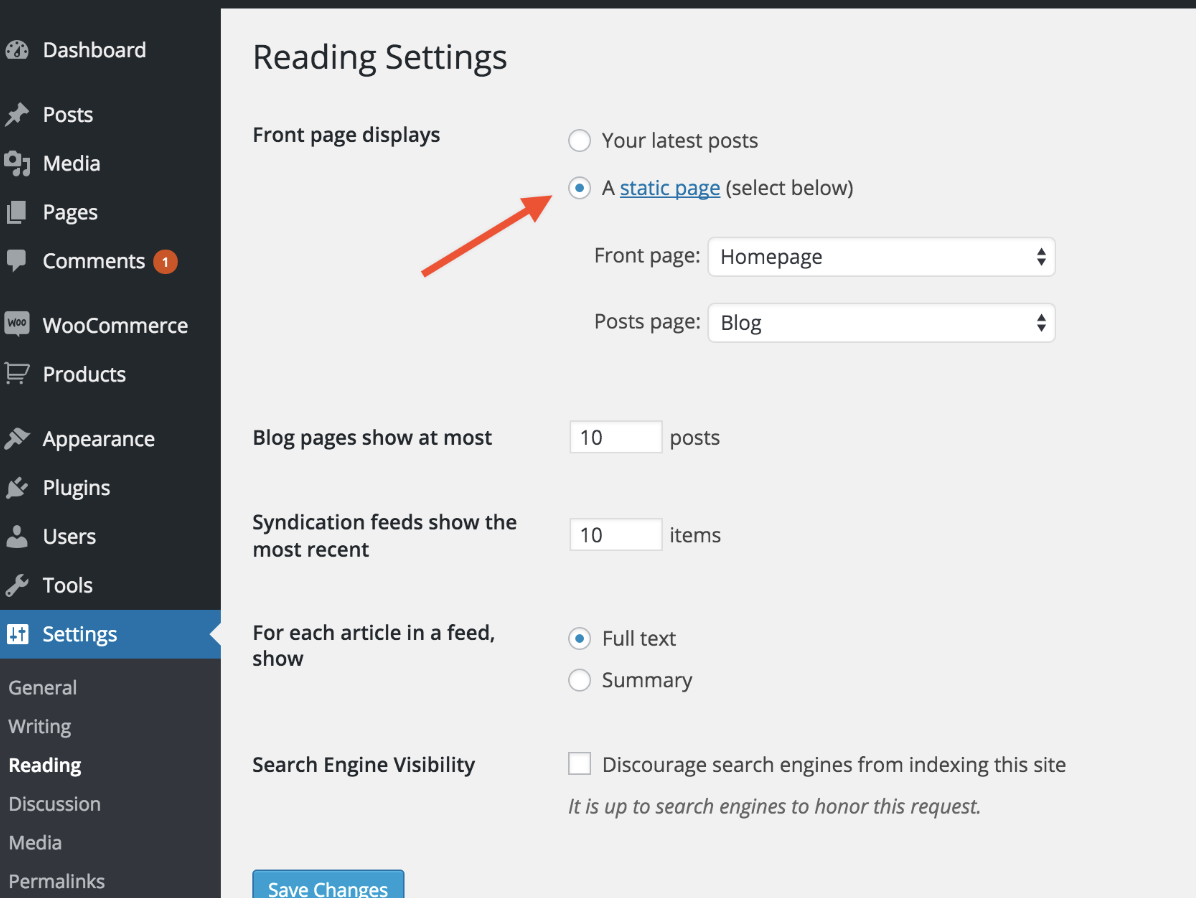
First, create static or dynamic pages under the “Settings” tab in your WordPress admin page.

Consider using a static page if you’re a business owner who prefers having content remain in one place on your website. For example, it wouldn’t make sense for your “About Us” page to contain content that moves around — you’d want that content to remain in one location for consistency. Consider using a dynamic page if you’re a blogger who prefers having your newest content appear at the top of your pages. This way your visitors can easily find your latest posts.

customizing-wordpress-website

Source: WooCommerce

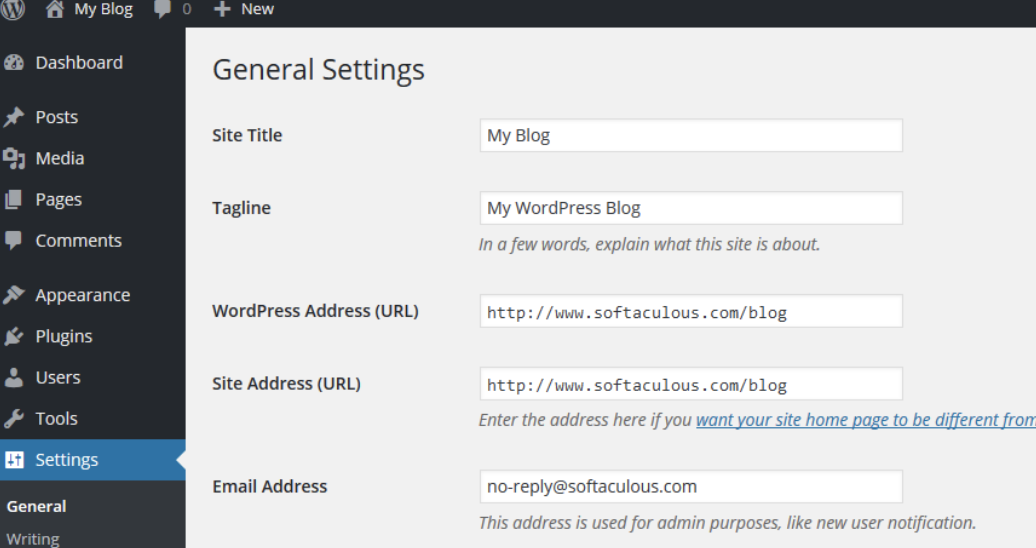
Titles can also be customized — to do this, head to your admin page. Under the “General” section in “Settings”, add a website title and tagline.

customize-wordpress-page-title

Source: Softaculous

One particularly handy customization feature is a navigation bar. This enables your visitors to easily move around your website and find whatever they need.

You can add a navigation bar by going to your admin page, clicking “Appearance” and then “Menus”.

wordpress-navigation-bars

Source: Wordpress

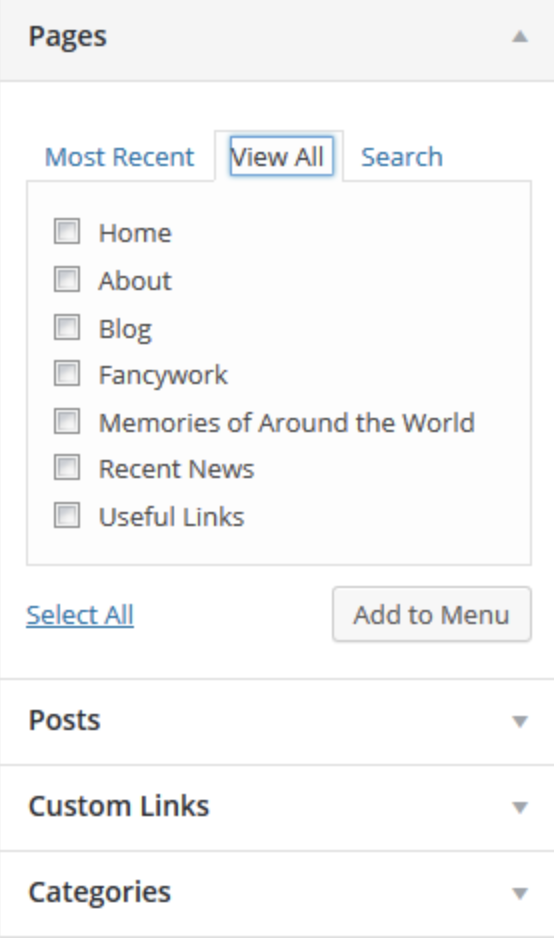
From here, you can determine how you want your bar to look, how many pages you want to include, what you want to title those pages, what order you want them to be listed in, and more.

customize-wordpress-navigation-bar
Source: Wordpress

Click here for more information on your WordPress site settings and customization options.

7. Install Your Plugins

Plugins are how you choose options and themes. They also enhance user experience with the help of features that your Wordpress website doesn’t automatically include. With over 56,000 available plugins, there are options for most every type of website and user. Some of the most popular plugins available include WordPress Contact Form, Yoast SEO, TablePress, The SEO Framework, HubSpot Conversion Tools, and Pixel Caffeine.

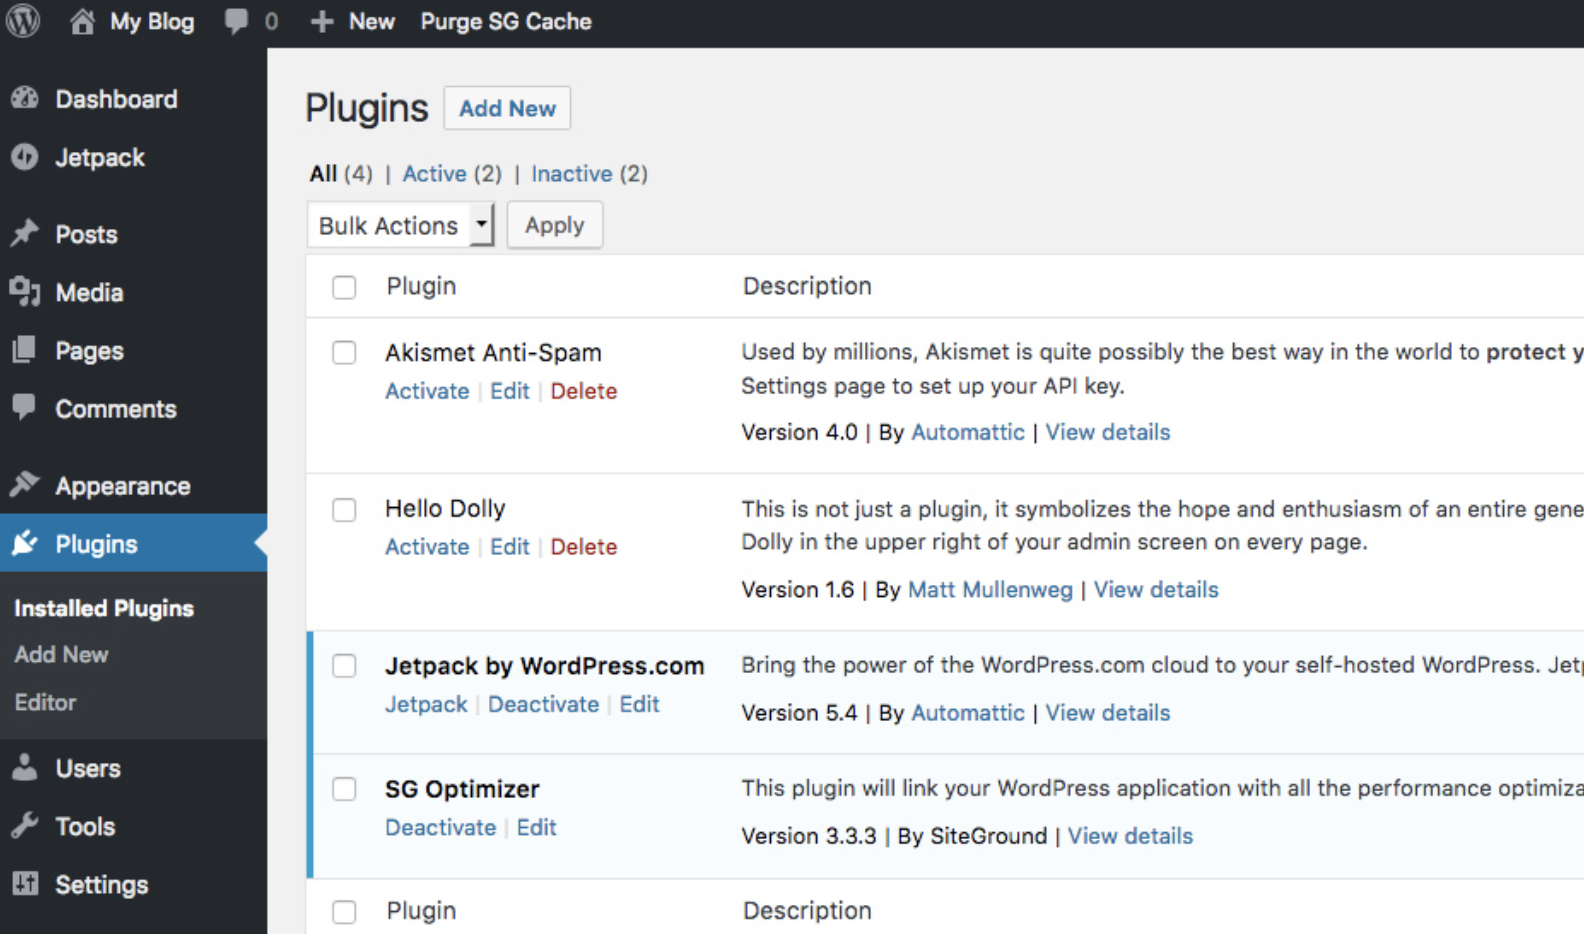
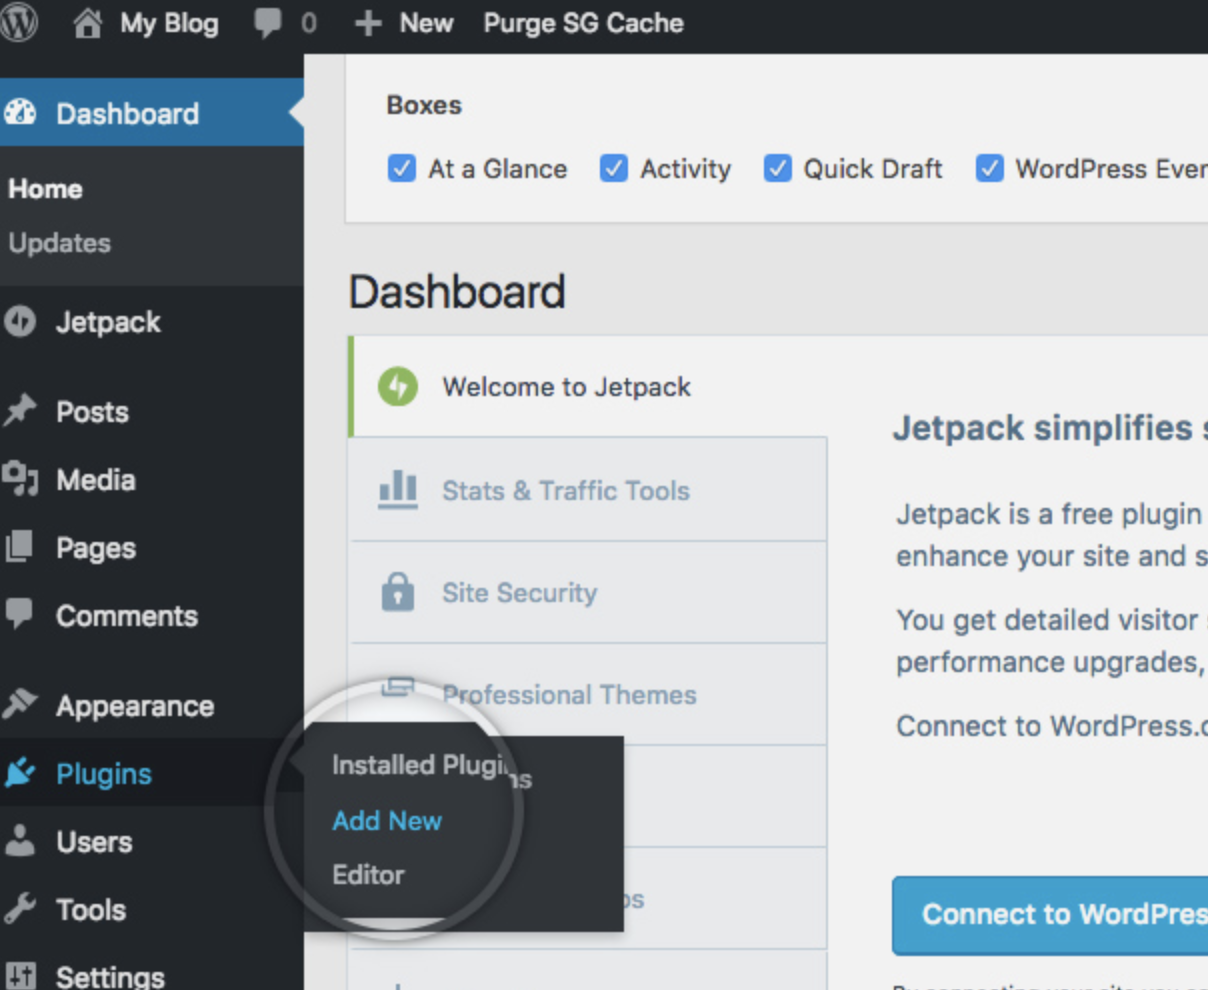
To begin installation, head to the “Plugins” button in your admin area.

install-wordpress-plugins

Source: SiteGround 

Click “Add New”.

install-plugins-in-wordpress

Source: SiteGround 

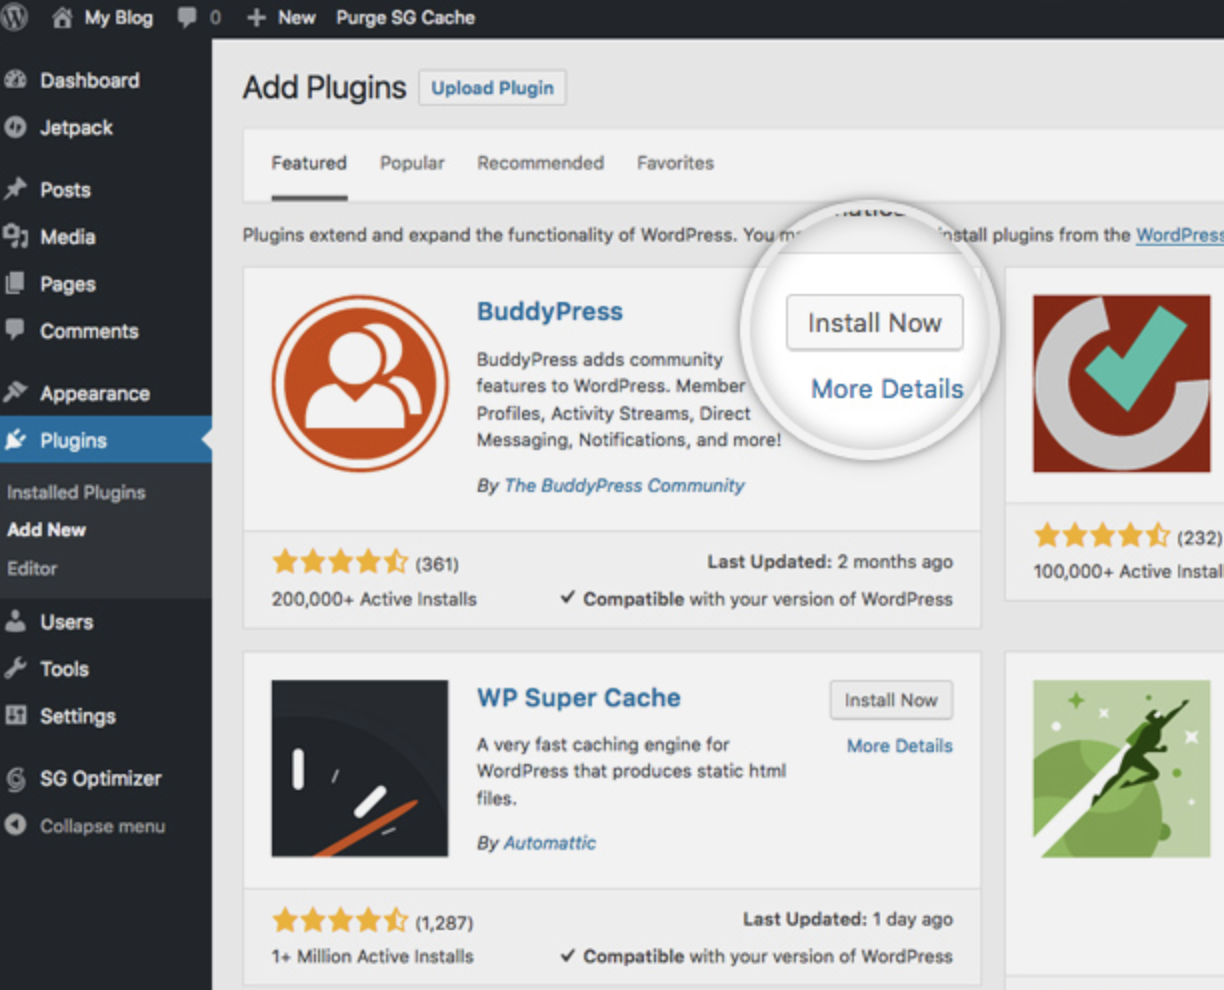
Browse or search for your desired plugin and then click “Install Now”.

wordpress-plugins

Source: SiteGround 

You should now have access to your new plugin.

WordPress Website Tips and Tricks

There are a number of WordPress tips and tricks to make your website as impactful and user-friendly as possible — we’ve listed 20 of them below to help you do just that.

1. Focus on the basics and create a great user experience with a WordPress theme that complements your business and website content.

2. Use dashes and not underscores when naming your files in WordPress. Google looks as underscores as joiners, meaning your file will look like one big word. That won’t help you with your SEO. Use dashes to make it obvious there are separate words. (For example, use www.example.com/this-is-an-example, not www.example.com/this_is_an_example).

3. Use WordPress’ online support for any questions or concerns you may have while creating or using your website. There are a number of forums and ways to reach out to WordPress experts listed on their website.

4. Use Image Alt Text to your advantage. Image Alt Text can be used to improve your SEO and Google rankings when used appropriately.

5. Keep your sidebar as organized as possible. Stick to the essentials and think about what your website visitors and buyer personas really need quick and easy access to.

6. Back up your website regularly so if you ever lose access or have technological difficulties, you have everything you need to completely restore your content. There are a number of plugins, such as Backup Buddy, made specifically for backing up your WordPress content.

7. Learn and understand SEO basics to ensure your website is completely optimized so you can boost your conversions.

8. Create a custom homepage. As mentioned earlier, WordPress will provide you with a default homepage. Take the time to create your own with a theme that works for your business — remember, this is your visitor’s first impression of your business, blog, or portfolio.

9. Keep an eye on your website’s performance and know what is and isn’t working for your visitors. There are a number of useful WordPress plugins to help with this.

10. Include an “About Us” page on your websiteto show your visitors you’re a trustworthy person and/or business. “About Us” pages are known to be the second most-visited pages on websites (after homepages) — so introducing yourself is important

11. Make sure your site is secure to ensure there are no hackers gaining entry. Again, there are plenty of plugins to help you with this.

12. Create custom permalinks. Permalinks are the permanent URLs that you plan to keep static for the foreseeable future. They’re important because they improve user experience and enhance your SEO.

13. Create a custom navigation bar (as we reviewed earlier) to make your site easy to use for your visitors.

14. Include excerpts and a click-through on your blog posts so people don’t land on your blog page and see your entire piece at once. By only including excerpts on your blog page, you make room to list all of your blogs in one location. Visitors can then read the excerpts and click-through to read the posts they are most interested in.

15. Structure your website in a way that makes sense for your business, visitors, and buyer personas. For example, use posts if you’re a blogger and use pages if you’re a business owner.

16. Remove “Comment” and “Share” buttons from specific pages of your website. You don’t need (or want) a “Comment” or “Share” button on your “About Us” page, or any of your service pages for that matter.

17. Consider what your website looks like on mobile. It’s no secret people are searching the internet while on their phones, tablets, and other mobile devices these days. Consider using a plugin to help you achieve a responsive, mobile WordPress design.

18. Use visuals and video content when possible to break up the text on your website pages.

19. Update your WordPress site and your plugins regularly. WordPress will tell you when updates are released. This will keep your website looking fresh and working efficiently.

20. Use social proof to show your new website visitors how many other people have already subscribed to your site and content. There are plugins to help you do this in a matter of minutes.

Conclusion

Having a great website matters. It’s how you connect with your visitors and leads, create a positive first impression with new users, and boost conversions. The good news is creating your own website doesn’t have to be a daunting process … at least not with WordPress.

The easy-to-use CMS offers completely customizable plans suitable for all needs. With no prior knowledge necessary, you can start building your own site for your business, blog, portfolio, or online store immediately.


from Marketing https://blog.hubspot.com/marketing/wordpress-website

The SEO's Guide to Google's Disavow Links Tool

If you’re an SEO, you probably know that backlinks are Google’s number one ranking factor. According to the search engine’s website, backlinks are a heavy indicator of a quality site. But to boost your website’s domain authority and rankings, acquiring an influx of backlinks isn’t enough. Pleasing Google's algorithm will never be that straightforward.

Google generally prefers your website’s link profile, which is a list of all your site's backlinks, to consist of links from a high variety of sites and high-authority sites -- they consider this a marker of an authoritative and trustworthy website.

That said, poor or undesirable links from low-authority sites can penalize your website and plummet your rankings just as much as high-quality links can boost them.

Fortunately, Google’s Disavow Links Tool lets you tell the search engine to ignore specific backlinks when it crawls your website. This allows you to nix spammy, irrelevant, and low-quality domains from your site and strengthen your link profile.

Before you start scrapping links from your website, though, you should know disavowing links that don’t pass the eye test could actually hurt your domain authority and rankings. Sites that seem spammy, irrelevant, or low-quality might not always be a threat to your site -- they might even boost your domain authority and rankings.

With this in mind, you must be absolutely sure the links you plan to disavow are harmful. But this begs the question: how do you objectively separate the good links from the bad? Read on to find out how.

1. Audit your link profile to identify your site’s most harmful links.

The first step to pinpointing your site’s most harmful links is examining all of your backlinks. This is impossible to do manually, no matter how big your site is, but, fortunately, you can analyze all your backlinks with SEMrush’s Backlink Audit Tool.

To use their Backlink Audit Tool, you first need to sign up for a free SEMrush account. After you do that, click on “Projects”, which is in SEMrush’s left sidebar.

Then, choose your domain and press “Set up” under “Backlink Audit”.

Next, select “www & non-www version” and click “Start Backlink Audit”. SEMrush will audit your website’s backlinks and give you a diagnosis in less than 10 minutes.

Once SEMrush completes your audit, they’ll show you a dashboard that displays the number of non-toxic, potentially toxic, and toxic domains that link to your site.

To add more backlinks or your website’s most recent backlinks to your audit, you can connect your Google Search Console account to the tool.

Finally, in the “Domains by Toxic Score” section, click on the red percentage or the toxic domains. You’ll land on a page that lists all your website’s referring domains that SEMrush deems harmful.

To find out why a domain is considered toxic, click on the domain’s toxic score and SEMrush will list its domain score, trust score, and toxic indicators.

You can also filter these toxic domains by their link network, spam in communities, harmful environment, manipulative links, irrelevant source domains, and other complementary options. All you have to do is press “Advanced Filters” and choose your toxic markers.

In SEMrush, you can actually upload these links into Google’s Disavow Links Tool, but if you feel more comfortable uploading them by yourself, export them into an Excel file and follow the next step.

2. Upload harmful links as a text file into Google’s Disavow Links Tool to disavow them.

After you’ve exported the toxic links into an Excel file, copy and paste them into TextEdit, if you use a Mac, or Notepad, if you use a PC. This will allow you to upload them as a text file into Google’s Disavow Links Tool.

Next, visit the Disavow Links Tool’s website, select your website, choose the text file, and then click submit. Google will process your request and disavow the links within a few days.

To boost your search rankings, you must prune your backlinks.

If you're dedicated to crafting compelling content, your website can earn a ton of high-quality backlinks. But the attention your content attracts can also appeal to some low-authority sites who could attach undesirable backlinks to your website. And Google will penalize you for them.

Fortunately, if you proactively prune your backlinks with SEMrush’ Backlink Audit Tool and Google’s Disavow Links Tool, you can maintain your link profile’s health, boost your website’s domain authority, and watch your rankings soar to the top of SERPs.


from Marketing https://blog.hubspot.com/marketing/google-disavow

Making Your Own Font Is Way Easier Than You'd Expect

If you're attempting to personalize branding materials or impress a client with a unique design, you might want to consider creating your own font.

It's easier than it sounds. I have limited (read: none) design talent, and I was able to create a font in ten minutes using Prototypo.io, a Typedesign software. There are plenty of alternative tools you could also consider, such as Fontself, Yourfonts, and Metaflop.

To quickly learn how to create your own font, follow these ten easy steps.

Disclaimer: With Prototypo.io, you cannot export your font to use on marketing design materials or documents unless you pay for Prototypo's Pro subscription. However, if you want to create your own fonts to use for personalized branding purposes, it might be worth the money. The Pro account is only $8.25 a month, and if you sign up for one year, you get four months free.

How to Make Your Own Font

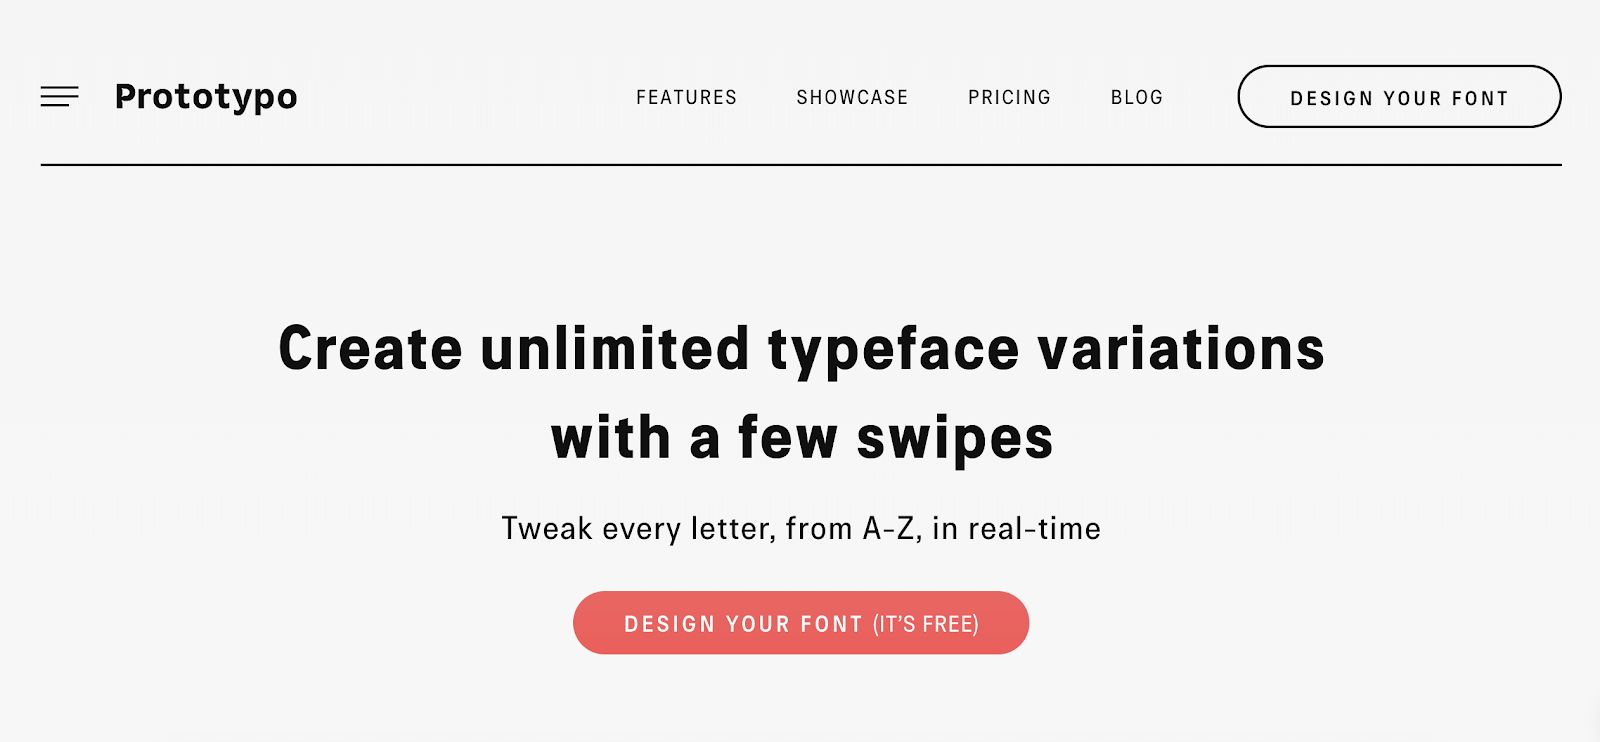
1. Go to Prototypo.io, and click the "Design Your Font" button.

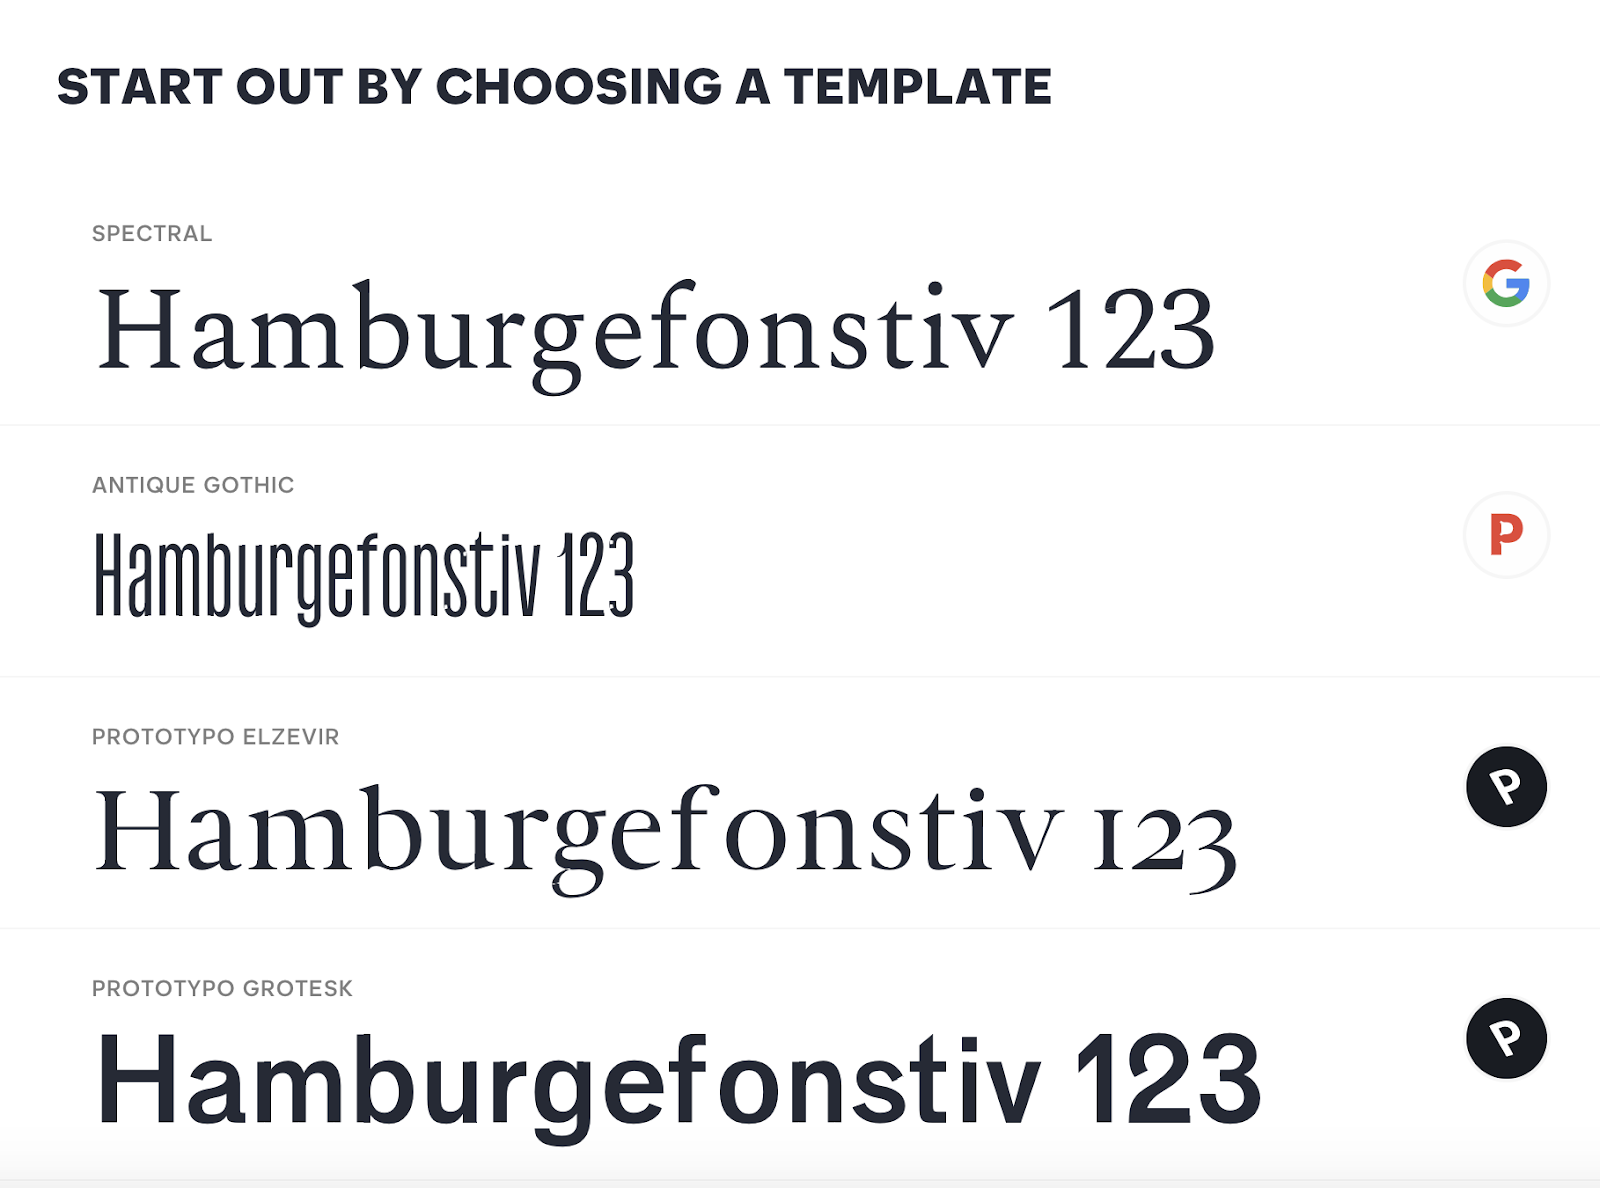
2. Once you fill out the sign-up form (You can sign up with your Facebook, Google, or Twitter accounts), you must choose a pre-made template. For my purposes, I chose "Prototypo Elzevir".

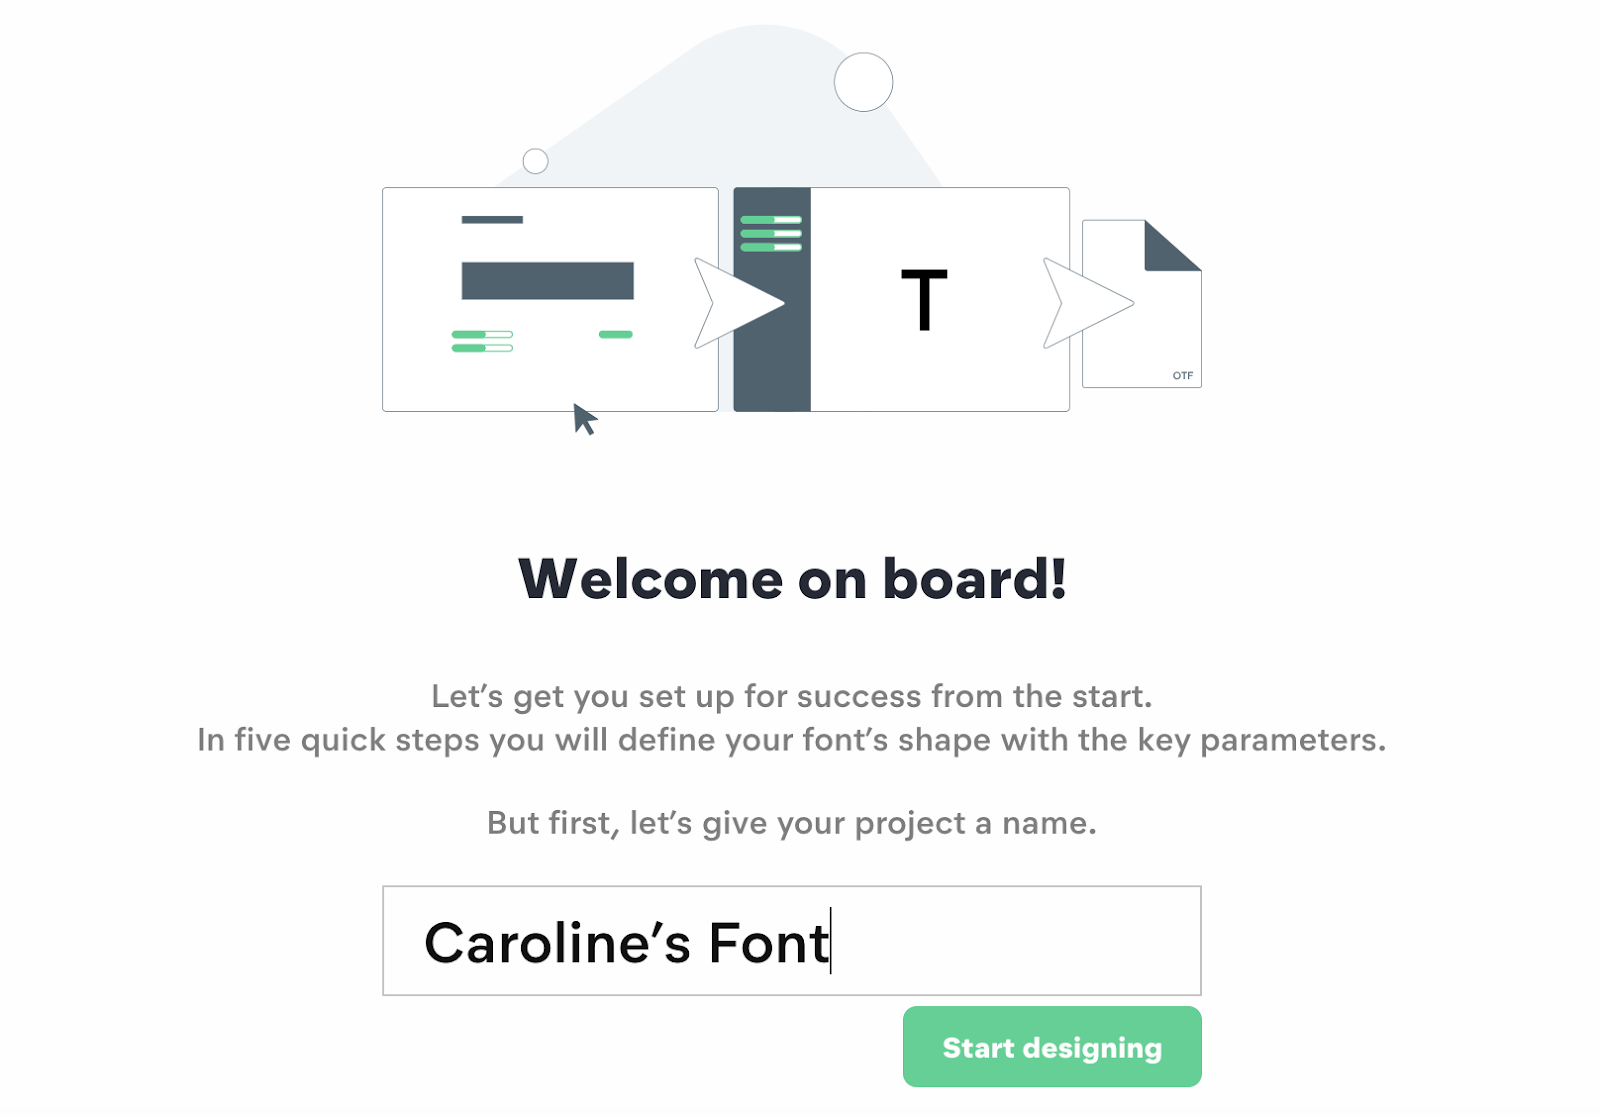
3. Next, name your project. Then click "Start designing".

4. You're now instructed to change height and width dimensions of your font by moving the green bar to the left or right. When you're happy with the proportions, click "Next".

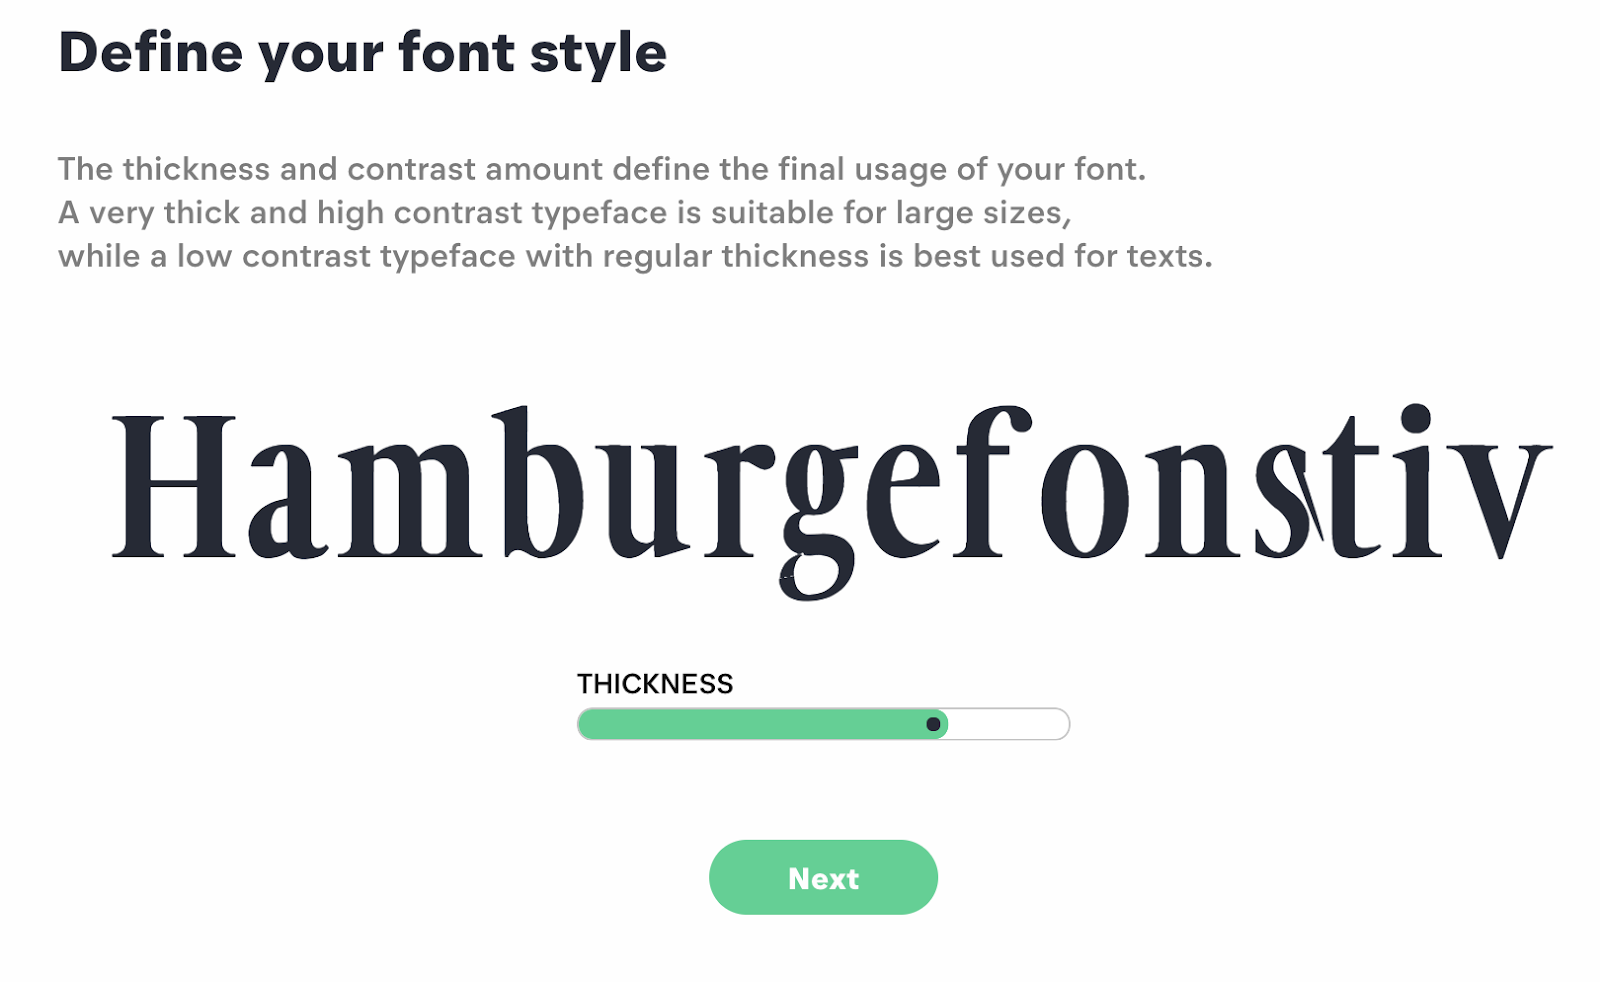
5. Now, adjust your font's thickness. When you're satisfied, click "Next".

6. Move the green bar to the right or left to adjust "Ascender" and "Descender" of your font. When you're happy with it, click "Next".

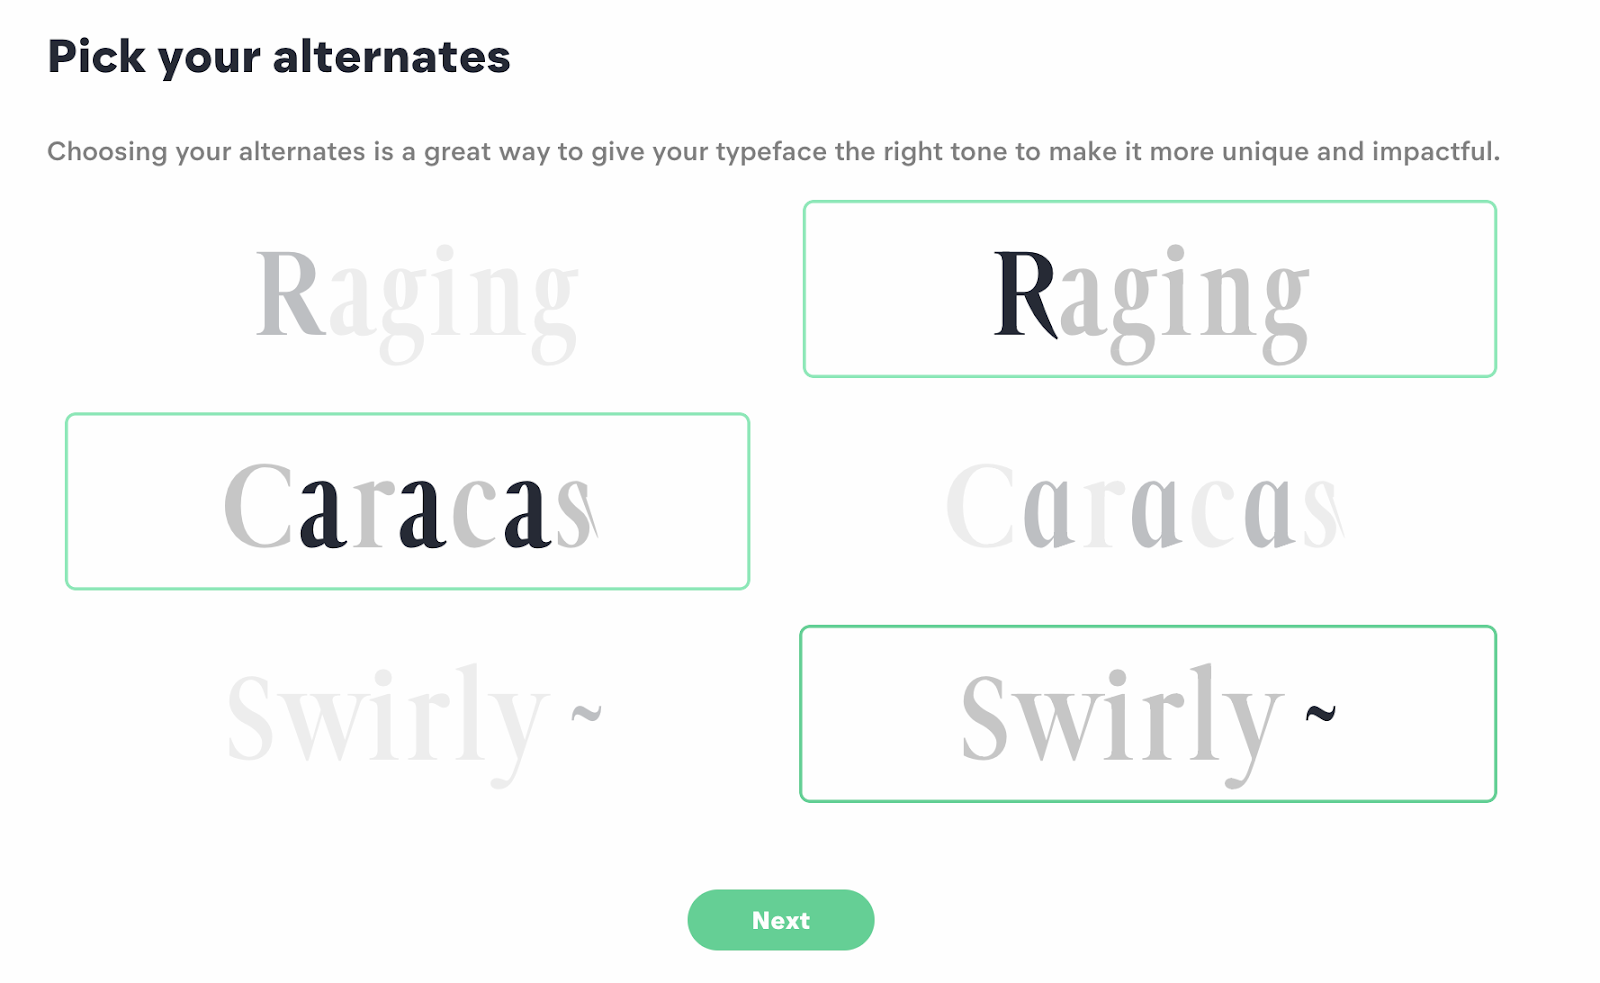
7. Now, choose one option in each row you prefer to solidify your font's uniqueness. For instance, I chose the "Raging" font on the right, the "Caracas" font on the left, and the "Swirly ~" font on the right to change how the "R" "A" and "~" will look in my font alphabet. When you're done, click "Next".

8. Move the green bar from left to right or vice versa to adjust your Serif height, width, and median. You'll see your font change on the screen, and when you're happy with how it looks, click "Next".

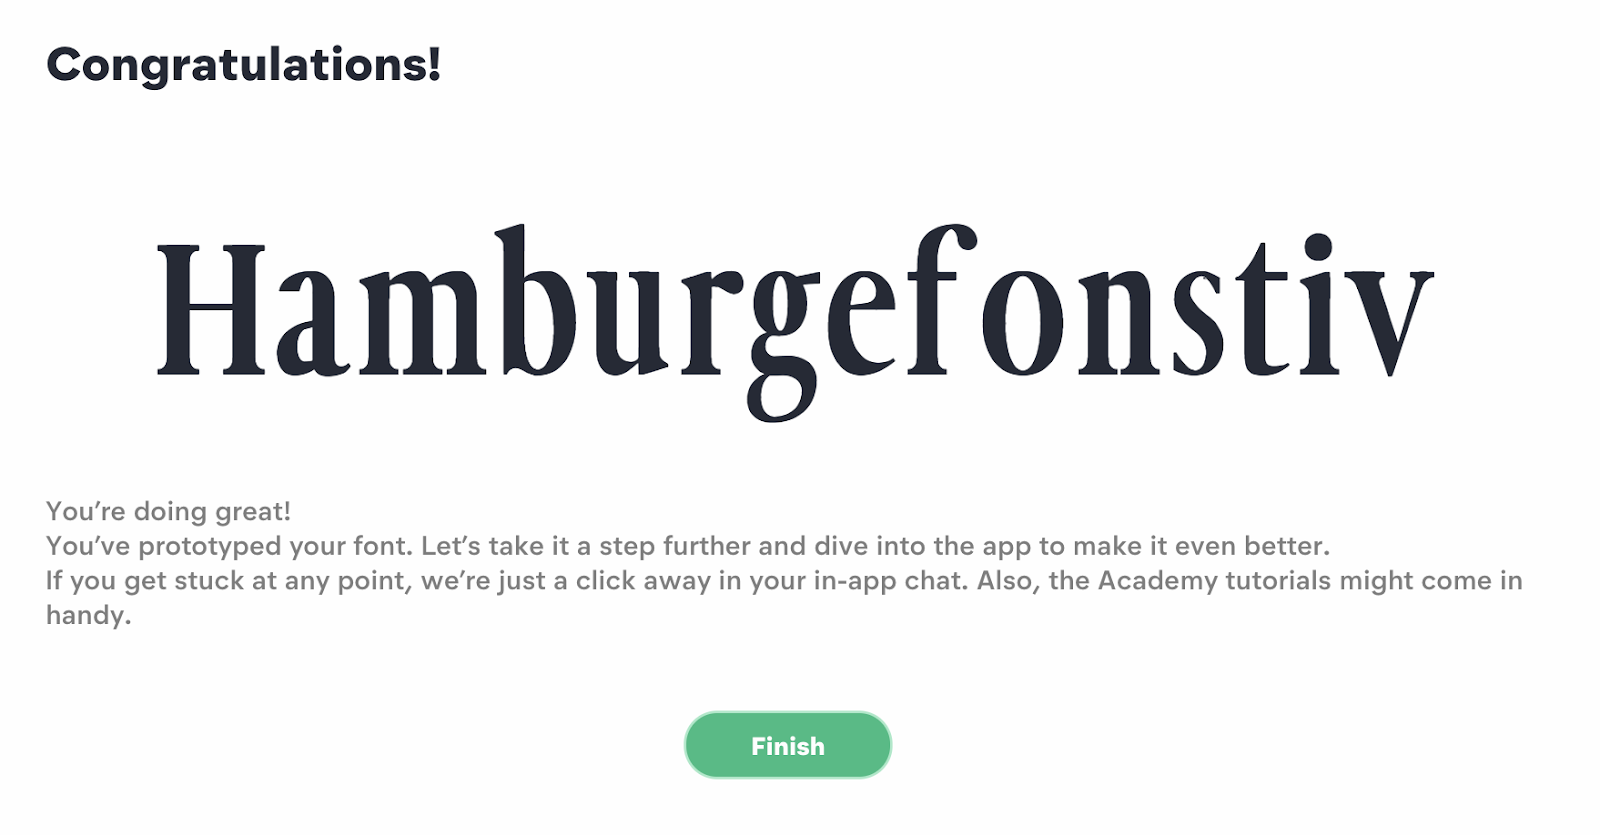
9. Now, you'll see the final result of your font. Click "Finish". You'll be given the option to watch a tutorial next, but you can skip the tutorial if you'd like to go straight to your dashboard.

10. Here's your account dashboard. You'll see all the choices you selected for your font on the left, such as capital height, width, and spacing. You can still adjust if need be. Additionally, there's a text box on the right, where I typed "Caroline Forsey's Font". You can type a paragraph to see if you like how your font looks.

11. If you pay for a Pro subscription, you can click "File" --> "Export font" to use anywhere you'd like. 


from Marketing https://blog.hubspot.com/marketing/make-your-own-font